Also published on our sister site: Ultimate Reloader.
If you’re working as a gunsmith on rifle barrels, actions, or related parts, chances are that you spend a lot of time with critical alignment. Every time you go to machine these parts you’ll need precise alignment with your lathe spindle. And these alignment tasks can eat up a LOT of time. Nathan Dagley over at Straight Shot Gunsmithing developed the True Bore Alignment System (TBAS) to make alignment both quicker, and better. And that’s what we’ll be exploring in-depth in this article.
About the True Bore Alignment System
From the True Bore Alignment System Product Page:
I wasn’t happy with the current action truing fixtures that were available on the market. I felt they put too much stress on the action during the truing process. Although you could dial in an action to .0001 TIR. using a spider system, when adjustment screws were relieved and the action moved back to a stress-free state, the truing cuts were no longer true with the stress free action therefore possibly not even improving the action during the truing process. This encouraged me to press on with designing the True Bore Alignment System.
In 2011 I purchased my first Haas TL-1, this gave me the ability to machine the ball and socket into my fixture. After many design adjustments and many long hours the True Bore Alignment System was created. It was a success from the start! It made my job in the shop so much easier! Quick dial in time, near stress-free work holding, maintaining .0001 TIR through machining processes, allowing me to hold short barrels and long barrels while bringing two points of the bore into alignment. All things that contribute to a superior accurate rifle! A barrel or receiver is held in the chuck and all the adjustments are made for axial and radial alignment on the True Bore Alignment System, therefore the stress that is incurred during adjustments is only effecting the True Bore Alignment System and not the part that is being held.
The True Bore Alignment System works extremely well for holding barrels, receivers, bolts etc…
Why should I purchase the True Bore Alignment System?
-
- Versatility in holding receivers, barrels, bolts Etc… when machining
- Increased productivity
- Better surface finishes due to rigid holding
- Holding barrels too short to go through the spindle while still having the ability to dial the bore in two points
- Holding parts stress free
- Extreme precision machining
- Eliminating chucking error
What’s Included with TBAS
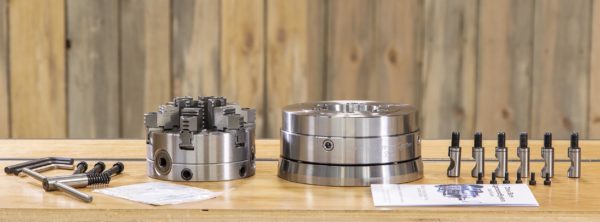
The True Bore Alignment System (right-hand side, pictured above) comes with the following:
- True Bore Alignment System core assembly
- Spindle adapter plate (D1-5 pictured above, includes cam-lock pins for D-mounts)
- Instruction booklet
You order the TBAS system for the spindle mount you have on your lathe, and for the chuck that you intend to use. Chucks are purchased separately, with one or more options available for purchase from Straight Shot Gunsmithing (see product page for current options).
The Gator 6″ chuck I got (left-hand side, purchased separately) comes with the following:
- 6″ 6-jaw chuck
- Mounting bolts
- Chuck key
- Allen keys
- Certification card and printed materials
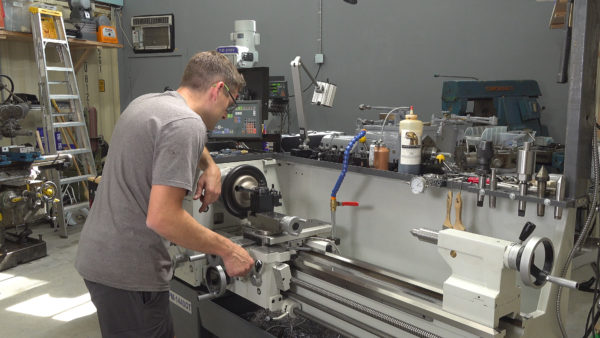
My Lathe
For this story, I’m using a Precision Matthews PM-1440GT. I believe this is the best gunsmithing lathe you can by new in the USA (Taiwanese made, not chinese, 2″ through-spindle capacity, Japanese high-precision spindle bearings, etc):
I also built a custom outboard spider that I built- you’ll want to check out that story. I plan to use this spider for supporting the end of long barrels with the TBAS system (not for alignment).
Installing and Setting up TBAS
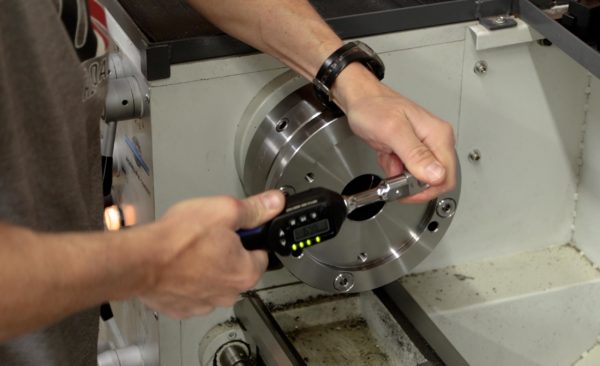
After installing the camlock pins on the spindle adapter plate, I installed the TBAS assembly on the lathe by means of the camlocks. The bolts that secure the TBAS core assembly to the spindle adapter plate are then torqued. I used a value of 30 ft-lb:
With the TBAS core assembly mounted, you can then perform an initial “dial in” of the TBAS system prior to installing the chuck.
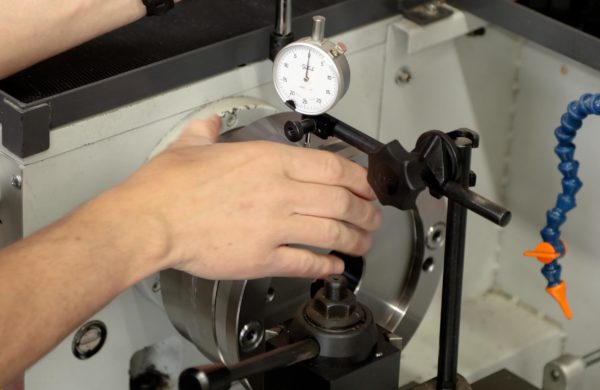
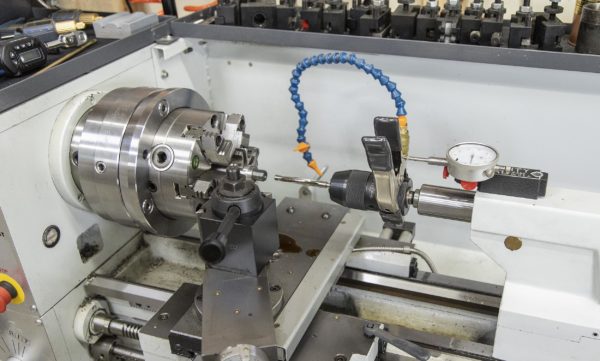
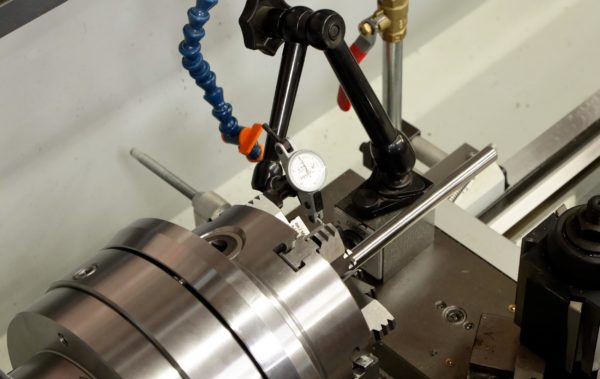
Above you can see checking axial alignment. I adjusted things until I had a Total Indicator Reading (TIR) of about 0.0005″ or less. Then, on to dialing in radial alignment:
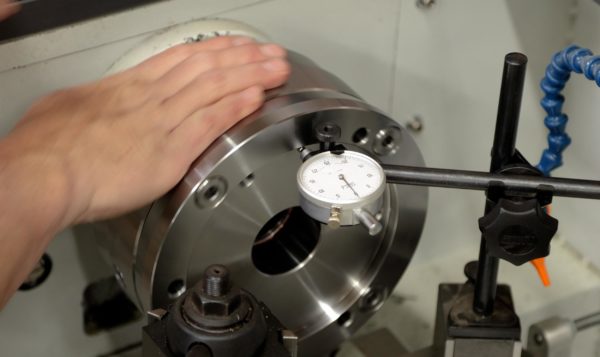
For radial alignment, I used the same goal of a Total Indicator Reading (TIR) of about 0.0005″ or less.
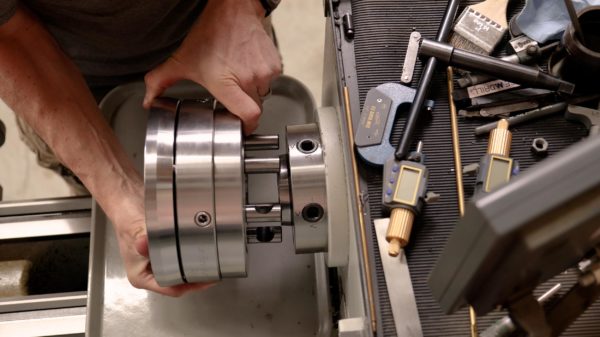
Then the chuck is mounted. For this, I started with the mounting bolts barely tight, and tapped the circumference of the chuck body until the chuck body ran true:

Finally, the chuck is torqued down to 60 ft-lb.
TBAS System Axes and Adjustments
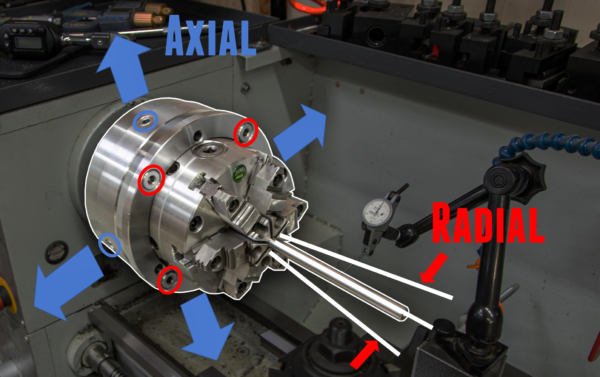
Above you can see the “Axes” and adjustments for alignment using the TBAS system:
- Axial adjustments (blue arrows above) move the axis of rotation up and down, or towards you and away from you when you are looking at the chuck when operating the lathe. Note circled axial adjustment screws: only two of four visible in this diagram.
- Radial adjustments (red arrows above) will adjust the angle between the work piece being held, and the lathe axis. Note the three visible radial adjustment screws circled in red: there are four total.
Dialing in the Work Piece using TBAS
Dialing in a work piece is a matter of alternating between:
- Axial readings and adjustments
- Radial readings and adjustments
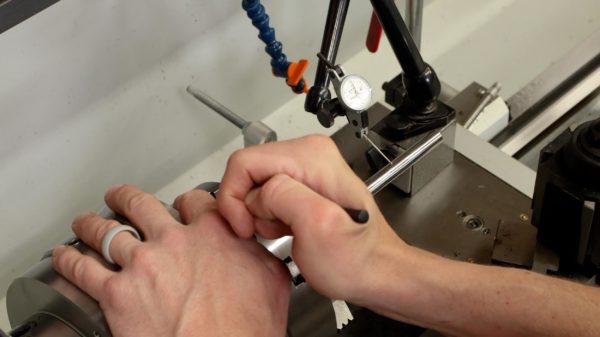
Just like when you dial in a work piece with a 4-jaw chuck, you’ll loosen one side, and tighten the other (180° apart around the chuck). The picture above is an example of checking axial alignment next to the chuck.
Here’s what it looks like to read runout and to adjust radial alignment: (away from chuck)
I started with axial alignment, moved on to radial alignment, and repeated the adjustments several times to “converge” on near-zero runout along the length of the test bar (ground rod). This worked quite well! For more details on dial-in procedure, refer to the video in this article.
It took me a LONG time to perfect barrel alignment for chambering jobs using a traditional 4-Jaw chuck and outboard spider. To contrast that, I was able to dial in work pieces with TBAS (I’ve already performed a job on a rifle, stay tuned for that and more related TBAS follow-up stories!) to a tight tolerance in about 1/2 the time. Combine that with the advantages of stress-free work holding and other benefits, and I’ll have to say I’m a believer in this system!
Get Yours
To get your TBAS, head on over to the Straight Shot Gunsmithing TBAS Product Page:

Don’t miss out on Ultimate Reloader updates, make sure you’re subscribed!
Thanks,
Gavin