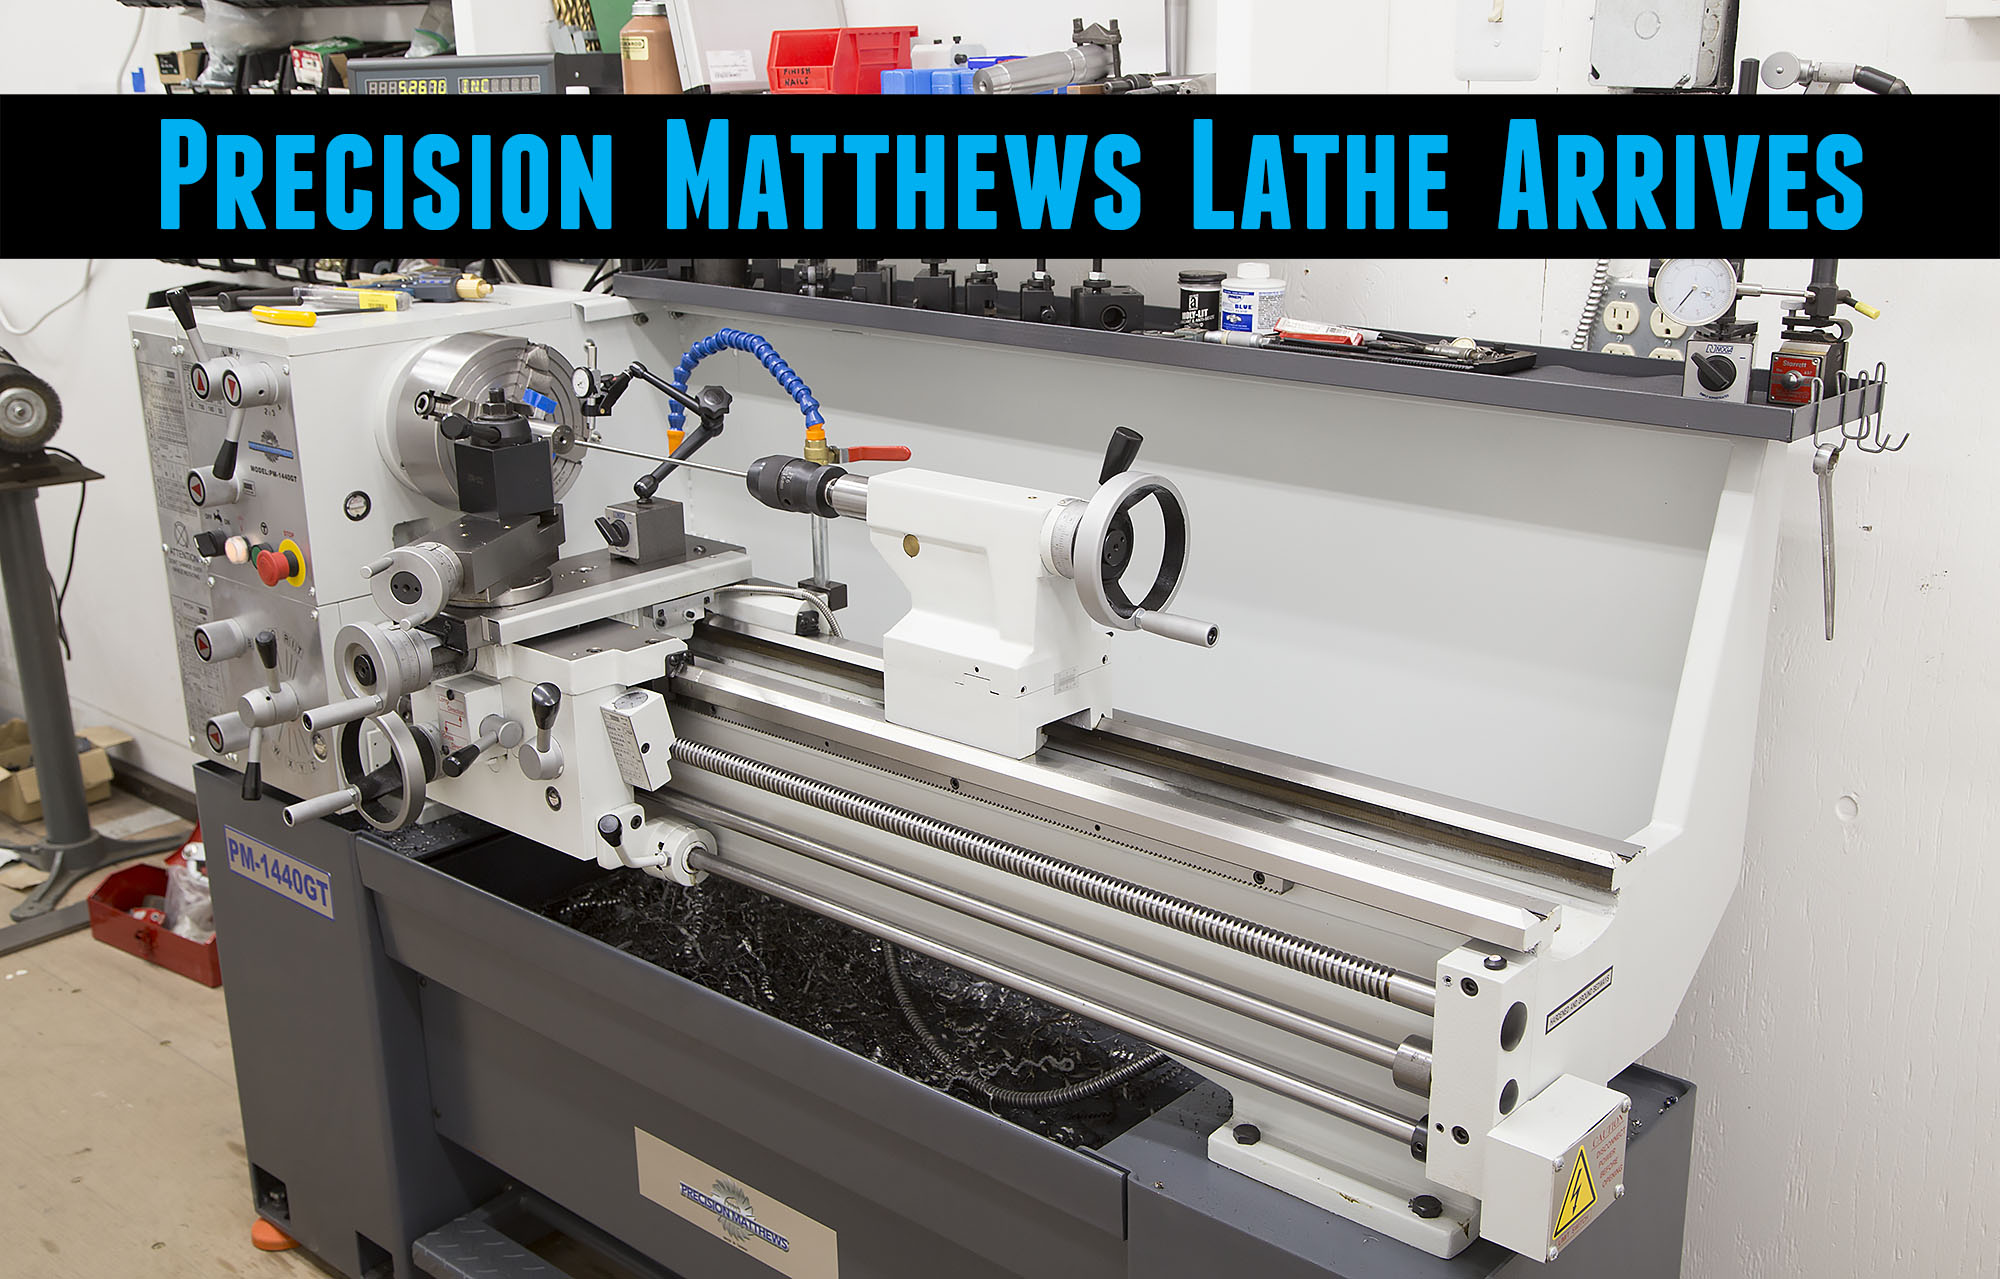
It’s here! It’s finally here! And it arrived unblemished! These are the words I exclaimed when I finished setting my new Precision Matthews PM-1440GT in place. This was the conclusion of my 6-month process that started with requirements and product research, and ended with a brand new ultra-precision lathe settled in the shop. It was a difficult decision to move away from my trusted Logan Model 1922 11″x36″ lathe, but I was confident this was a good direction when I ordered the new lathe. And now, I can say I’m really glad that I pursued this upgrade- after 5-6 hours running the lathe, I’m really excited about what I’ll be able to do with this new machine. Here’s the story of how this lathe was transported, unloaded, and set in place:
A Difficult Decision
Any machinery purchase is a difficult decision in my book. There are so many options, so many trade-offs, and so much capital at stake, it can be a long and difficult process deciding what to buy. It’s a major commitment, not one you want to make on the spur of the moment. While I really like my Logan 11″ x 36″ lathe, my desire to build match-grade rifles was the tipping point towards a change.
Here are the key things I felt like I was missing:
- Capacity- I knew I would need ~2″ through-spindle capacity to do 50 BMG barrel work.
- Availability of attachments: My Logan is well tooled, but I couldn’t find a good source for affordable taper attachments, follow rests, and steady rests- things I knew I would need.
- Spindle speeds: My Logan doesn’t quite have enough speeds, and it’s a bit difficult to change speeds
- Power: Under some circumstances, I have bogged the machine down
- Precision: While the Logan has a tight-and-true spindle- the ways are not as straight as when the machine was built in 1955
After looking around at a lot of machines, I settled on the Precision Matthews PM-1440GT. It’s a Taiwanese precision machine with a ton of great features, and offers more capacity. More on that when I post the full overview of this machine. It turns out great minds think alike- after ordering mine, I discovered that Bill Marr from http://rifleshooter.com has the same lathe!
Final Decisions
One of the things I spent a while thinking about was the motor options available with the Precision Matthews PM-1440GT- you can get the machine shipped with a 2hp single-phase motor, or a 3-hp three-phase motor. At first I ordered the three-phase model, thinking I would wire up a VFD. After looking at the complexity of the wiring involved, I decided to go the single-phase route- I had enough projects on the horizon! I also decided on the “Preferred Package” which includes a micrometer stop and other nice extras.
I visited the product page many times, and read the PM-1440GT PDF manual three times before settling on the items in the order, and my strategy for how to get this lathe into the shop:

The Hard Part: Waiting
After the order was complete, I had to wait my turn to get through the backorder situation since this lathe is in high demand. That was actually just fine since I was finishing the Mountain Shop, and was also looking forward to better weather. The wait also gave me time to think about where all of my machinery would go, and the game plan for moving equipment, installing power, and other details. I went through about five iterations of my shop layout as I finished building, and it has turned out WAY better because I had more time to plan and prepare.
Then came the email! I had a shipping confirmation and tracking number from the trucking company- now it was starting to feel REAL.
Game Day
I had originally planned to move the two machines I had ordered (The PM-1440GT lathe, and a Precision Matthews PM-949TV mill) in the late snow season. Then I thought it would be the mud-bog season. The day the machines arrived was far less stressful- beautiful blue skies, solid ground, only some dust to deal with. I was excited. I had called the shipping company to coordinate from the driver, and met him down at another local delivery.

I got only a glimpse of the crates as he was shutting the roll-up door- I would have to wait to see the rest.
We headed out with him following up the crazy mountain road where I live, not an ideal delivery route. It was slow going, but we made it- and then came the unloading process. To tell you the truth- I had some nerves going. I knew the lathe and mill would be hanging from backhoe forks and straps and what not- and that always makes me a touch nervous. What if a hydraulic hose blew while hoisting the machine? I chose not to ponder on that thought too long…
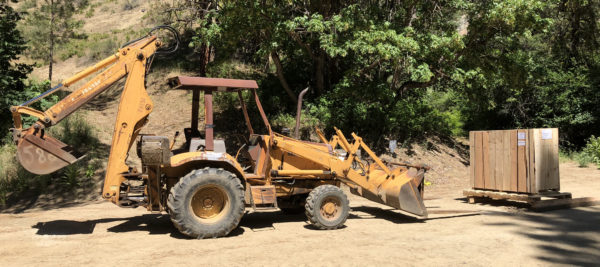
Things ended up going really well- we did have some issues to figure out, but both machine offload sequences were successful. We set the mill in the back of the shop and un-crated it (stay tuned for that story) and when it was moved to its final resting place, we set the lathe and crate down in front of it.
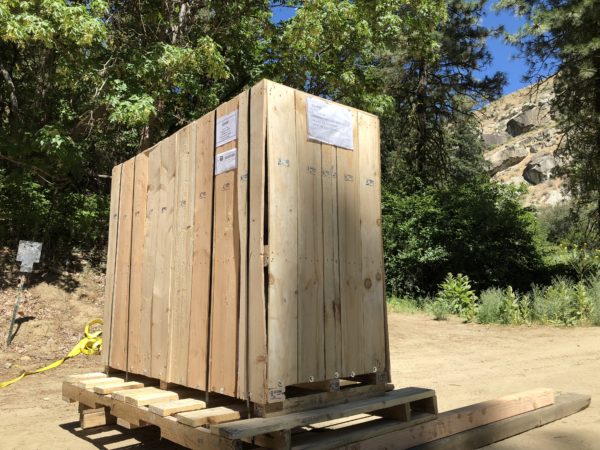
Standing in front of the lathe crate was a bit like standing in front of a fence with gaps in it- I couldn’t resist trying to see what was on the other side- but it was dark, and I couldn’t see much. Soon, this machine would be uncovered!
After un-crating the Lathe and moving the wood and packages aside came the really precarious part of the process- picking it up with straps and spreaders, just like the manual shows:
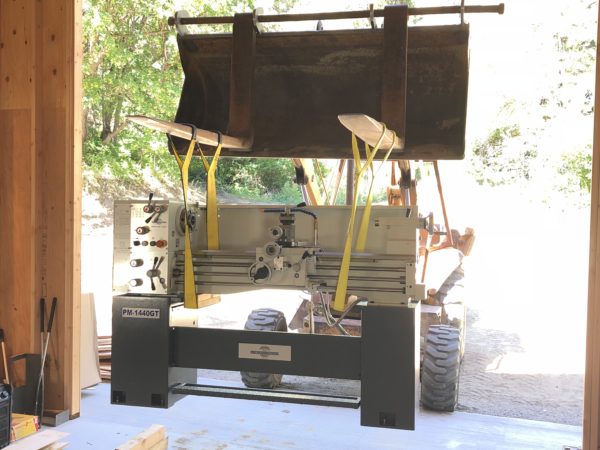
There’s nothing quite like backing up a backhoe while your new ultra-precision lathe shakes with each bump in the road. “Take it slow” I kept telling myself. And it wasn’t too long before I set the lathe down on the Egyptian-style rolling pipe supports. I had put two wood beams in place and shimmed them totally level- what turned out to be a very stable platform when the lathe rested on it.
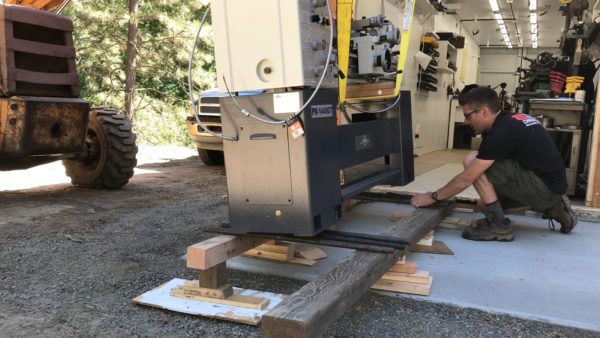
The black pipes enable the lathe to roll “near effortlessly” – requiring only gentle pushes and frequent pipe handing as pipe sections are kicked out the back. Placing the pipes in front of the lathe cabinet bases was very slick- they would roll right under the lathe as it moved. Furthermore, the pipe sections make it easy to twist or “steer” the machine almost like a ship gliding into port with rudder movements guiding the way.
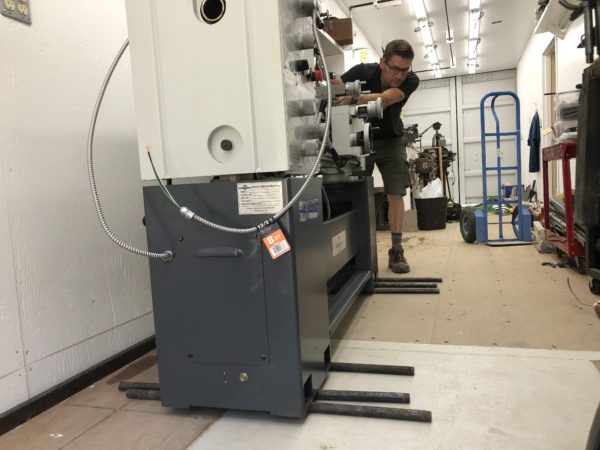
It was easy- almost too easy, but I’ll take that any day over machinery moving drama! I made sure I could access the electrical panel on the back of the machine before settling it in place, and got it perfectly parallel to the wall. Then came the “delightful surprise”- the cast iron feet that come with the machine slid right under the bolts that press on them. Tightening the bolts down lifted the lathe off the pipes which slid out like magic. It was almost as if I had planned it that way! What a great feeling… Here’s a picture I took just after “touchdown”:
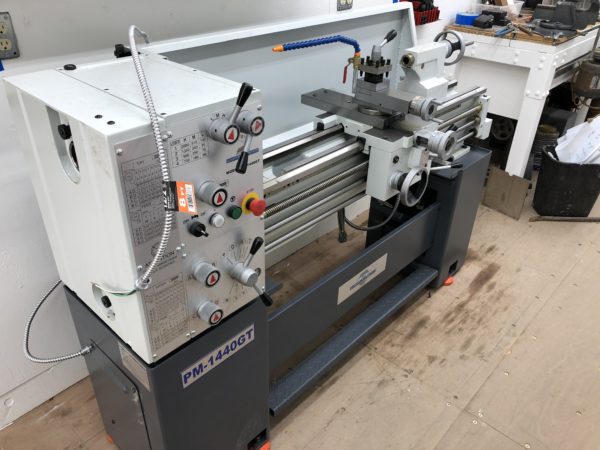
The machine was in place, and now it was time to spray the bare metal parts down with WD-40, and wipe the cosmoline residue off with rags. It took less time than I though- perhaps 2-3 hours, more if you include removing cosmoline from all of the accessories. This lathe was starting to look like it was ready to work!
A Great Start, Great Things to Come
I’ve had the chance to machine a handful of parts on the PM-1440GT already, and have really been enjoying the experience. After aligning the lathe, I’m seeing really good numbers for axial and radial alignment (headstock, tailstock, etc). I’ll have an article and video coming up soon chronicling the design and construction of an outboard spider for long rods and rifle barrel work, so make sure you’re subscribed. In addition, I’ll be doing a complete series covering lathe fundamentals, an in-depth overview of the PM-1440GT, and some cool projects. It’s going to be BUSY- but I can’t wait! Oh, and there a whole bunch of milling content coming too!
I’m off to do some machining, talk to all of you soon!
-Gavin


Now with six months of time with this lathe, how do you feel about it? Any regrets or shortcomings. I am weighing between this and the Grizzly 0509G.
No regrets whatsoever, this thing is amazing. If you’re willing to make an outboard spider for a gunsmithing late I think it’s a great option!
Hey Gavin,
Congratulations on the Lathe and the Mill! I also purchased the PM 949TV and installed it about two weeks ago. Still working on setting it up but the chips that I have made so far are awesome! It’s a great machine! My next purchase is the PM 1440GT. I am really wrestling with the 3 phase and therefore the 3 HP option as opposed to 2 HP Single phase. My question is, are you satisfied with the 2 HP? Are you finding any lack of power in normal situations? What were your other concerns about the 3 phase option?
Thanks!
All the best!
B.
Sorry this is late, but absolutely no issues with horsepower with the single phase motor and 2ph 🙂
is the outboard spider video done yet
Not quite yet 🙂
Good lathe
Hi Gavin. I too am ex MSFT, I remember seeing your posts about your plans and we talked a bit about the acoustics of the interior firing position. Cool to see you did exactly what you planned to do. Anyway … I see you located this lathe on a wood floor. I would like to get your impressions on how that worked out. Is it basically just a layer of wood over a concrete base or are there joists? Any special build for this?
Hi Mark! Good to hear from you. I don’t recall the discussion about the firing pin acoustics 🙂 I did move the lathe to the concrete floor in the shop. I think that’s better, but it can work on wood too.
Thanks,
Gavin