Originally published on our sister website: Ultimate Reloader.
All of the hard work I’ve put into this 224 Valkyrie Remington 700 build is about to come together, literally! With a complete barreled action assembly, it’s time to install our trigger, and then mate the stock and barreled action together. I can hardly wait to take this rifle to the range! And by the end of this post, we’ll be much closer towards that goal!
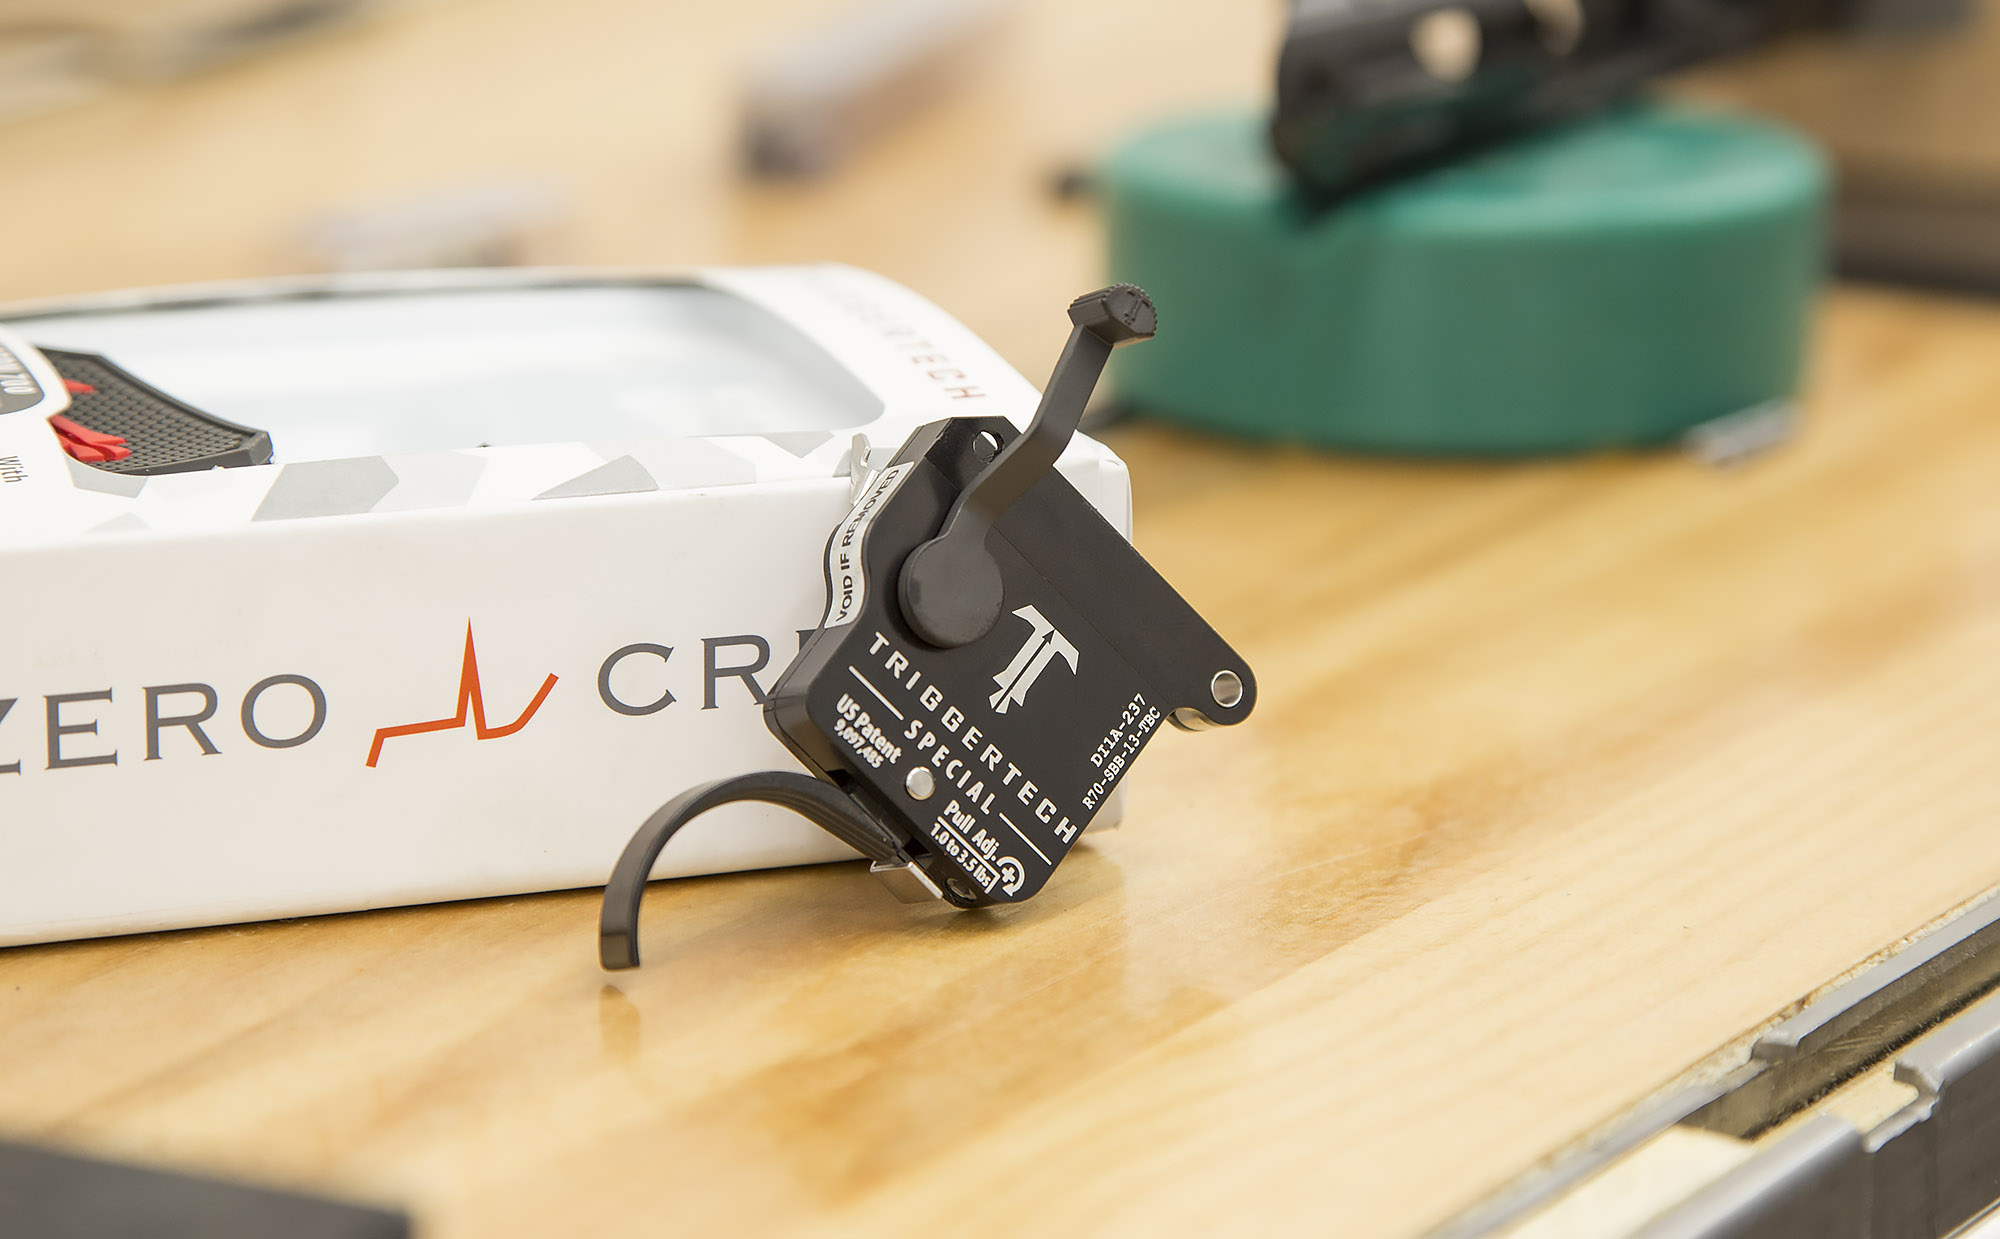
TriggerTech Special Trigger Install
The TriggerTech Special is an affordable high-end trigger, and is advertised as having “no creep”. That got my attention! So it was a logical choice for this build.
From the TriggerTech product page, here’s some specifics:
Intended use:
Benchrest, competition, precision shooting, military, law enforcement, long range hunting, F Class, rugged hunting, harsh environments operations, target shooting, ultra long range, varmint hunting.
Trigger Control Details:
- Trigger Lever Type: Straight or Curved
- Trigger Action: Single Stage
- FRT: Yes
- TKR Technology: Yes
- CLKR Technology: Yes
- Overtravel: Sub .015″
- Pull Weight: 1.0lbs-3.5lbs
- Bolt Release: With or Without
- Safety: With (removable)
- Hand: Right & Left (+ $20)
- Warranty: Product lifetime
- Weapon Platform: Remington 700
- Material Details
- Housing: 7075 Aluminum (annodized)
- Key Components: 440C Stainless Steel
- PVD Black (+$10) – PVD stands for Physical Vapour Deposition. It is a hard and durable coating that is applied to external stainless components to give them a clean black color.
Note: this trigger doesn’t come with trigger install pins- it’s assumed you’ll be re-using the pins that came with your rifle. I made a couple of pins from 1/8″ music wire that I had in the shop.
We start the install by fitting the bolt stop and bolt stop spring. These parts are held in place with the rear trigger pin:
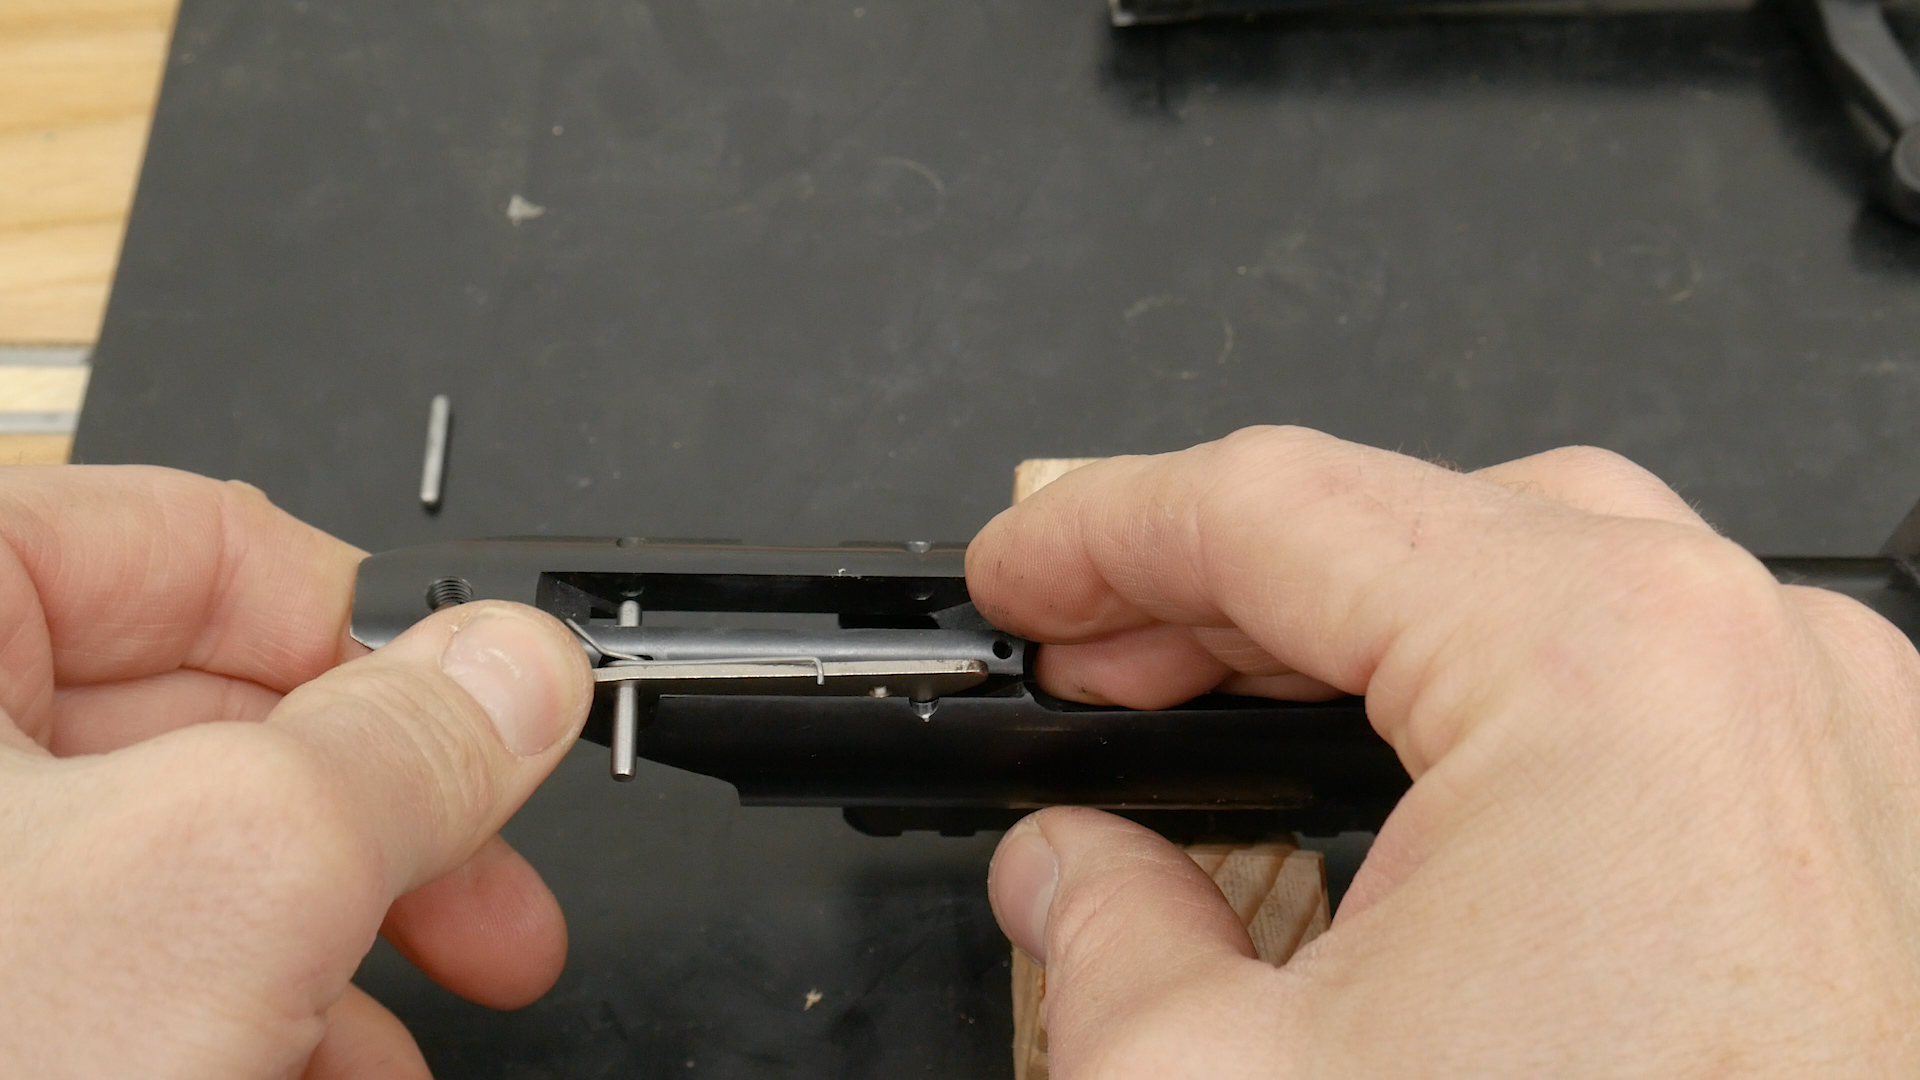
We then fit the front trigger pin, and make sure neither trigger pin is protruding into the trigger cutout in the receiver:

Now we can drop in the trigger, and tap the pins in place. Note: Make sure the safety lever on the trigger is in “Safe” position, not “Fire” position:
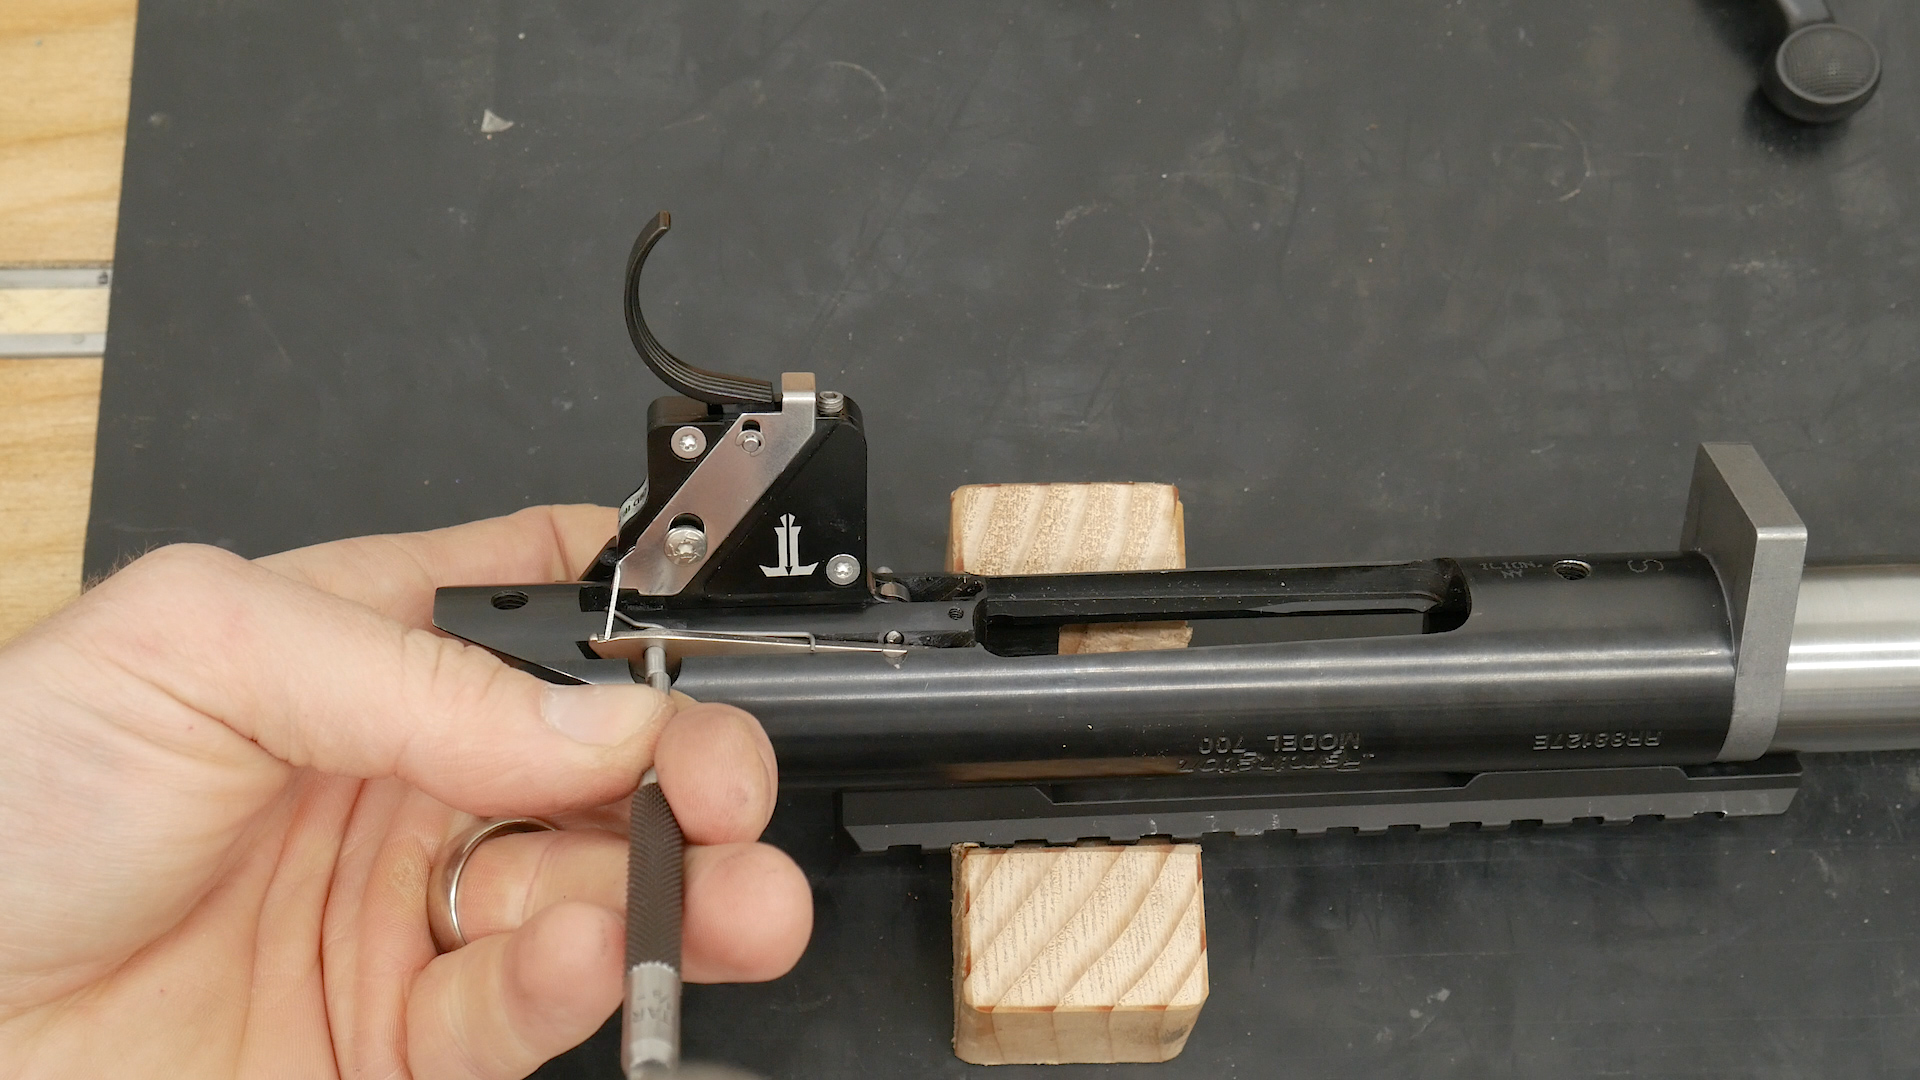
Make sure both pins are positioned properly. Check to make sure the front pin isn’t pushing against the bolt stop, and check for smooth bolt stop pivoting:

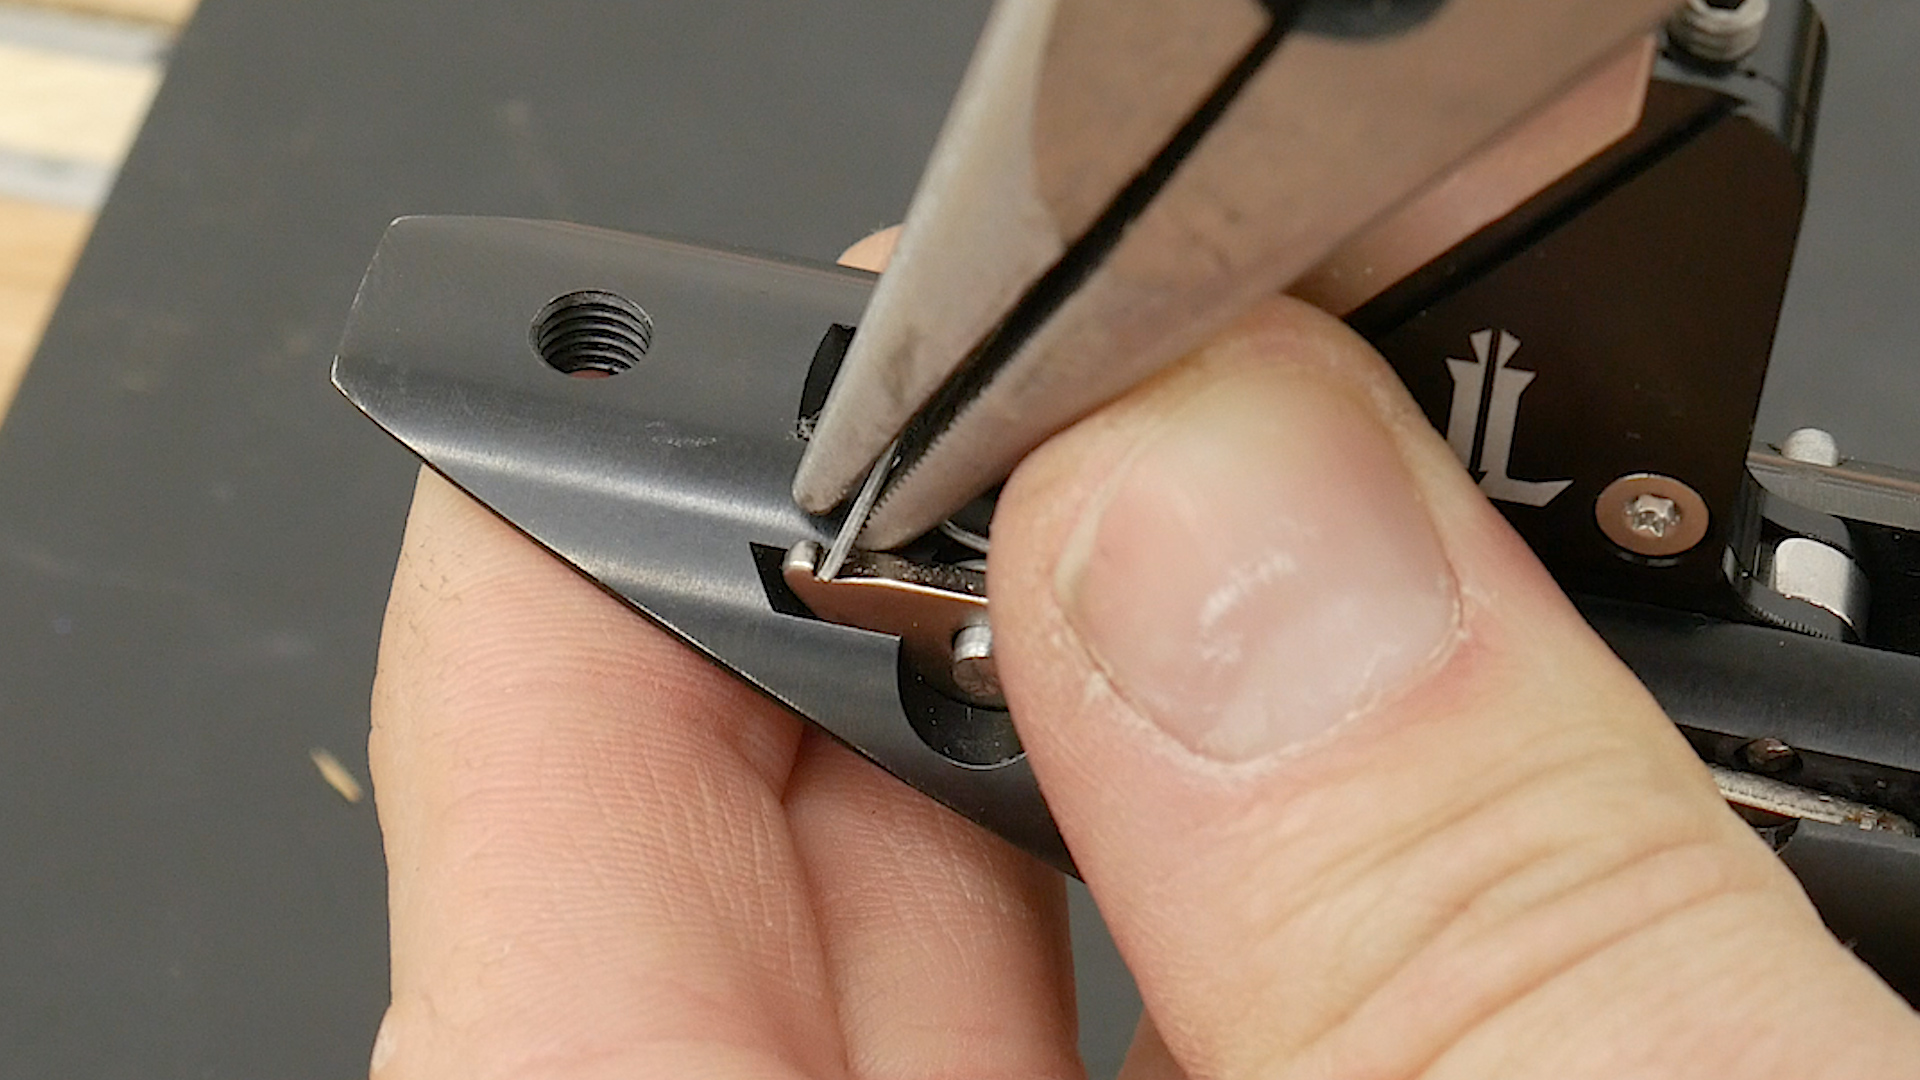
Then bend the trigger-mounted bolt release bracket tip so that it aligns with the “Vee” in the bolt stop (only bend if needed):
The trigger is now installed! Time for a function check:
- Make sure the chamber is clear
- Install the bolt in the receiver
- Lock the bolt down
- Press on the trigger to dry fire the rifle
- Test function of bolt stop and release, move bolt backwards against stop, press release and validate that bolt comes free
Note: I’ll have a more in-depth review of this trigger, including testing on the TriggerScan (with multiple pull weights), so make sure you’re subscribed to follow the story… Now on to the stock install!
Fitting the KRG Bravo Stock
The KRG Bravo stock is big on features, but is very affordable. That’s my kind of product! This is a great option for a Remington 700 build, and I like the fact that it’s ready for use with an oversized recoil lug- like the Badger Ordnance unit I’ve used on this build (0.312″ thick).
Here’s what’s included with the KRG Bravo:
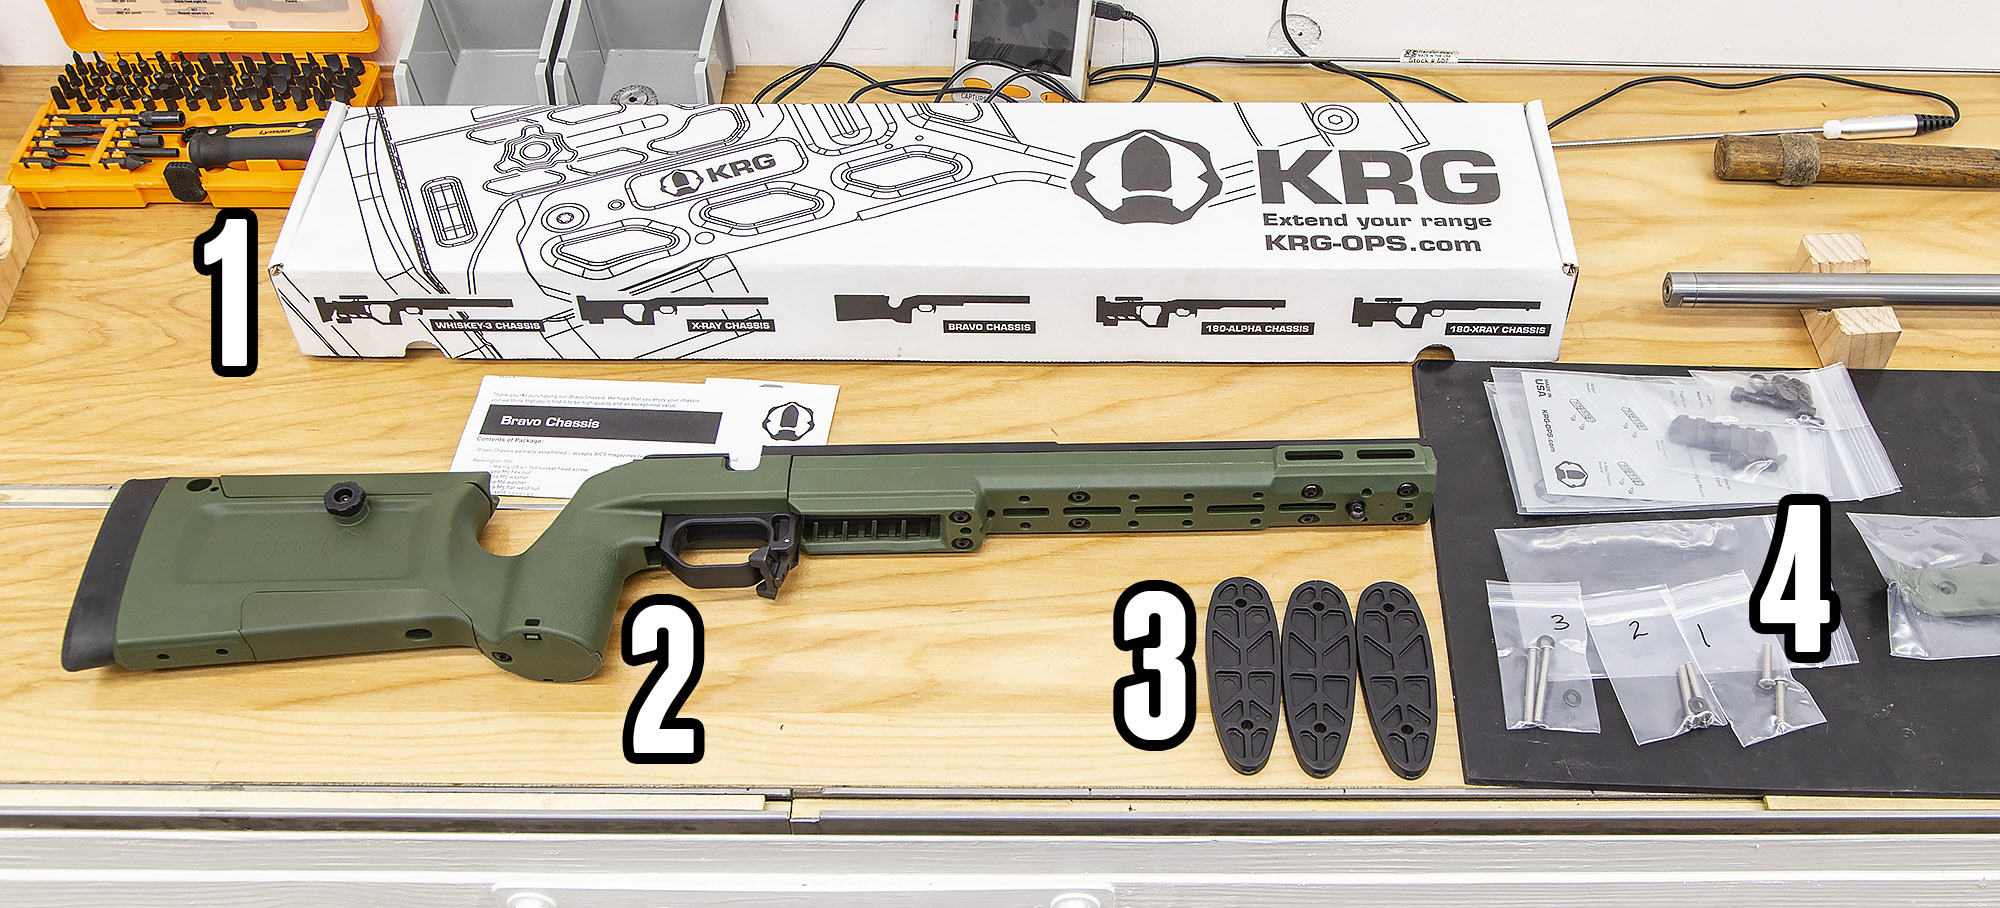
Above we have:
- Box
- KRG Bravo Chassis Stock assembly (backbone)
- Length-of-pull adjustment shims
- Hardware and accessories: Buttpad screws (sets for each length-of-pull length), picatinny rail section, QD attach point, “butthook” piece for bottom of buttstock, mounting hardware
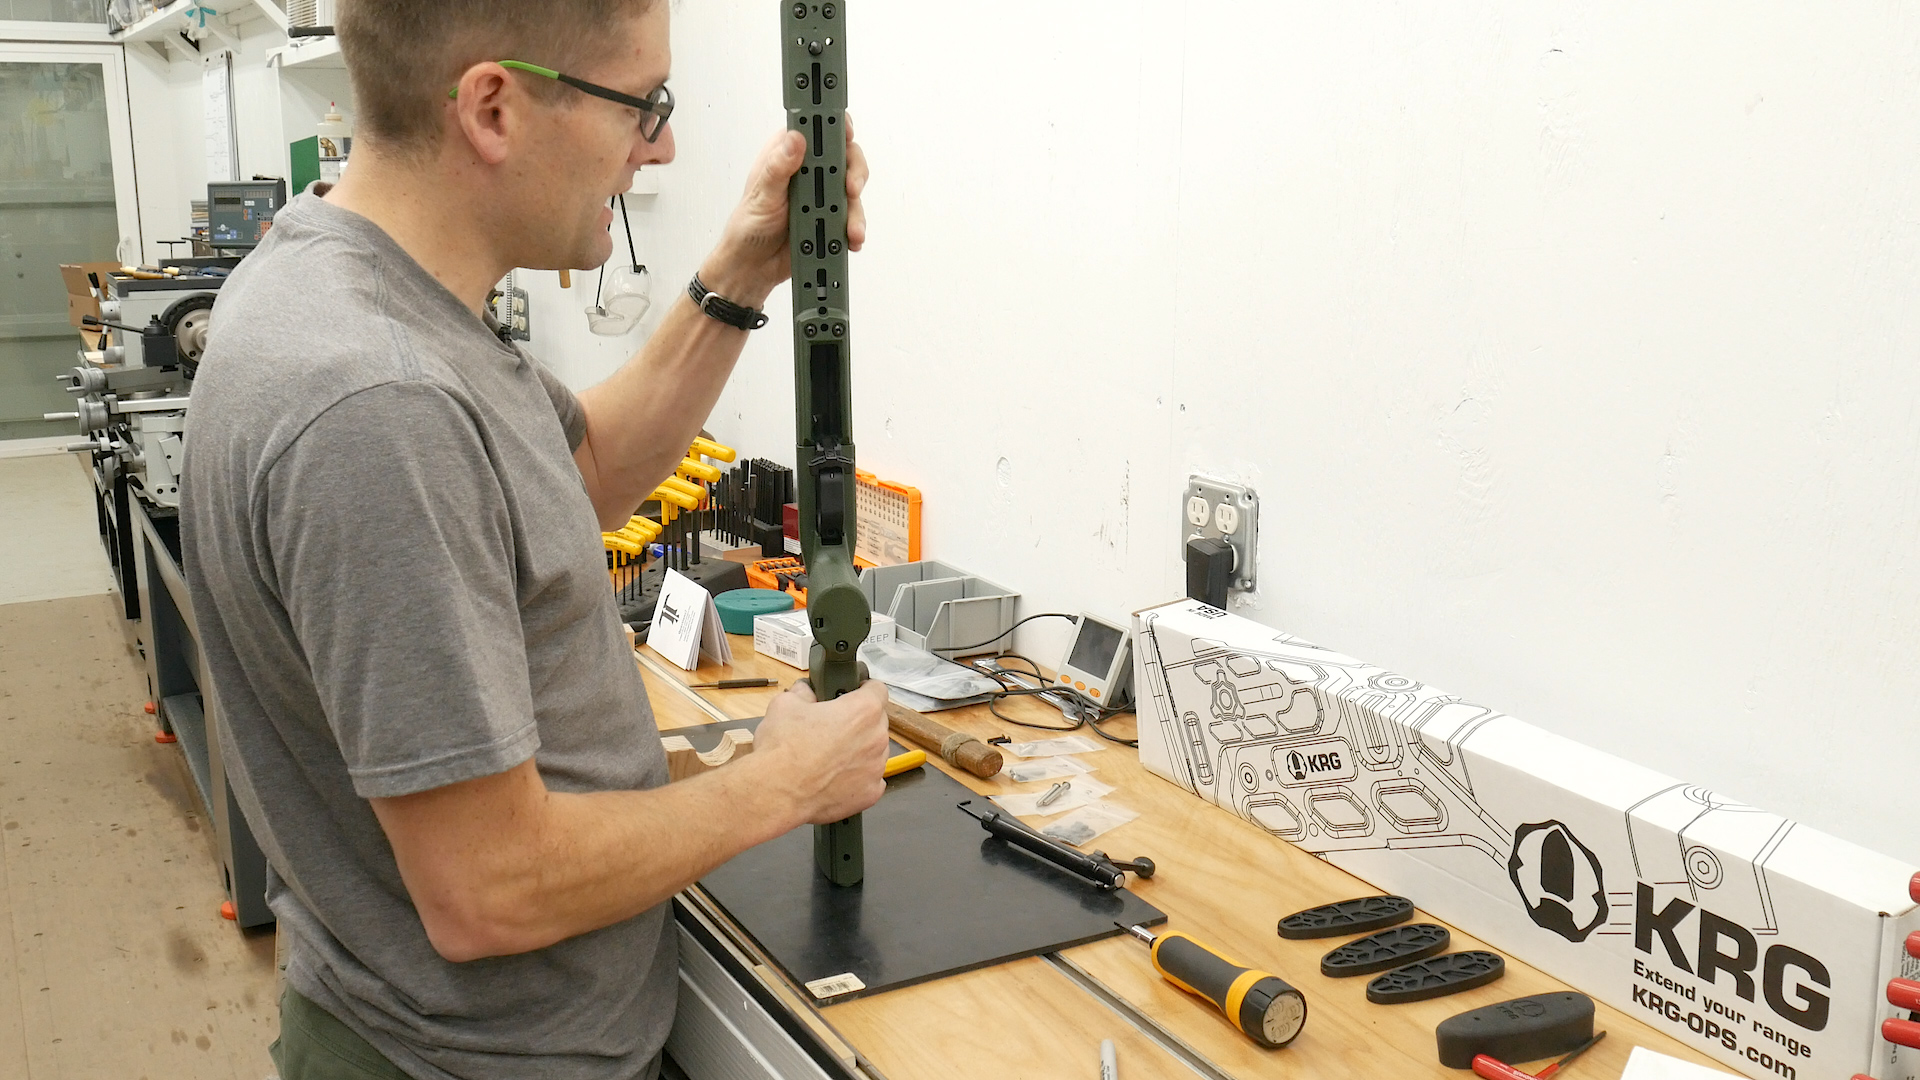
The KRG Bravo stock install is very straightforward! Let’s walk through the process…
Start by lowing the stock into the barreled action, and finger tightening the front and rear action screws:

Then, with the rifle upright, tap the buttstock against your bench a few times to seat the recoil lug against the backbone:
Now it’s time to torque down the action screws, alternating between front and rear screws, settling in at 65 inch-pounds. I didn’t have a long tip for my Fatwrench, So I used a T-Handle wrench for the front screw instead. I was careful to torque both screws to the same torque value:
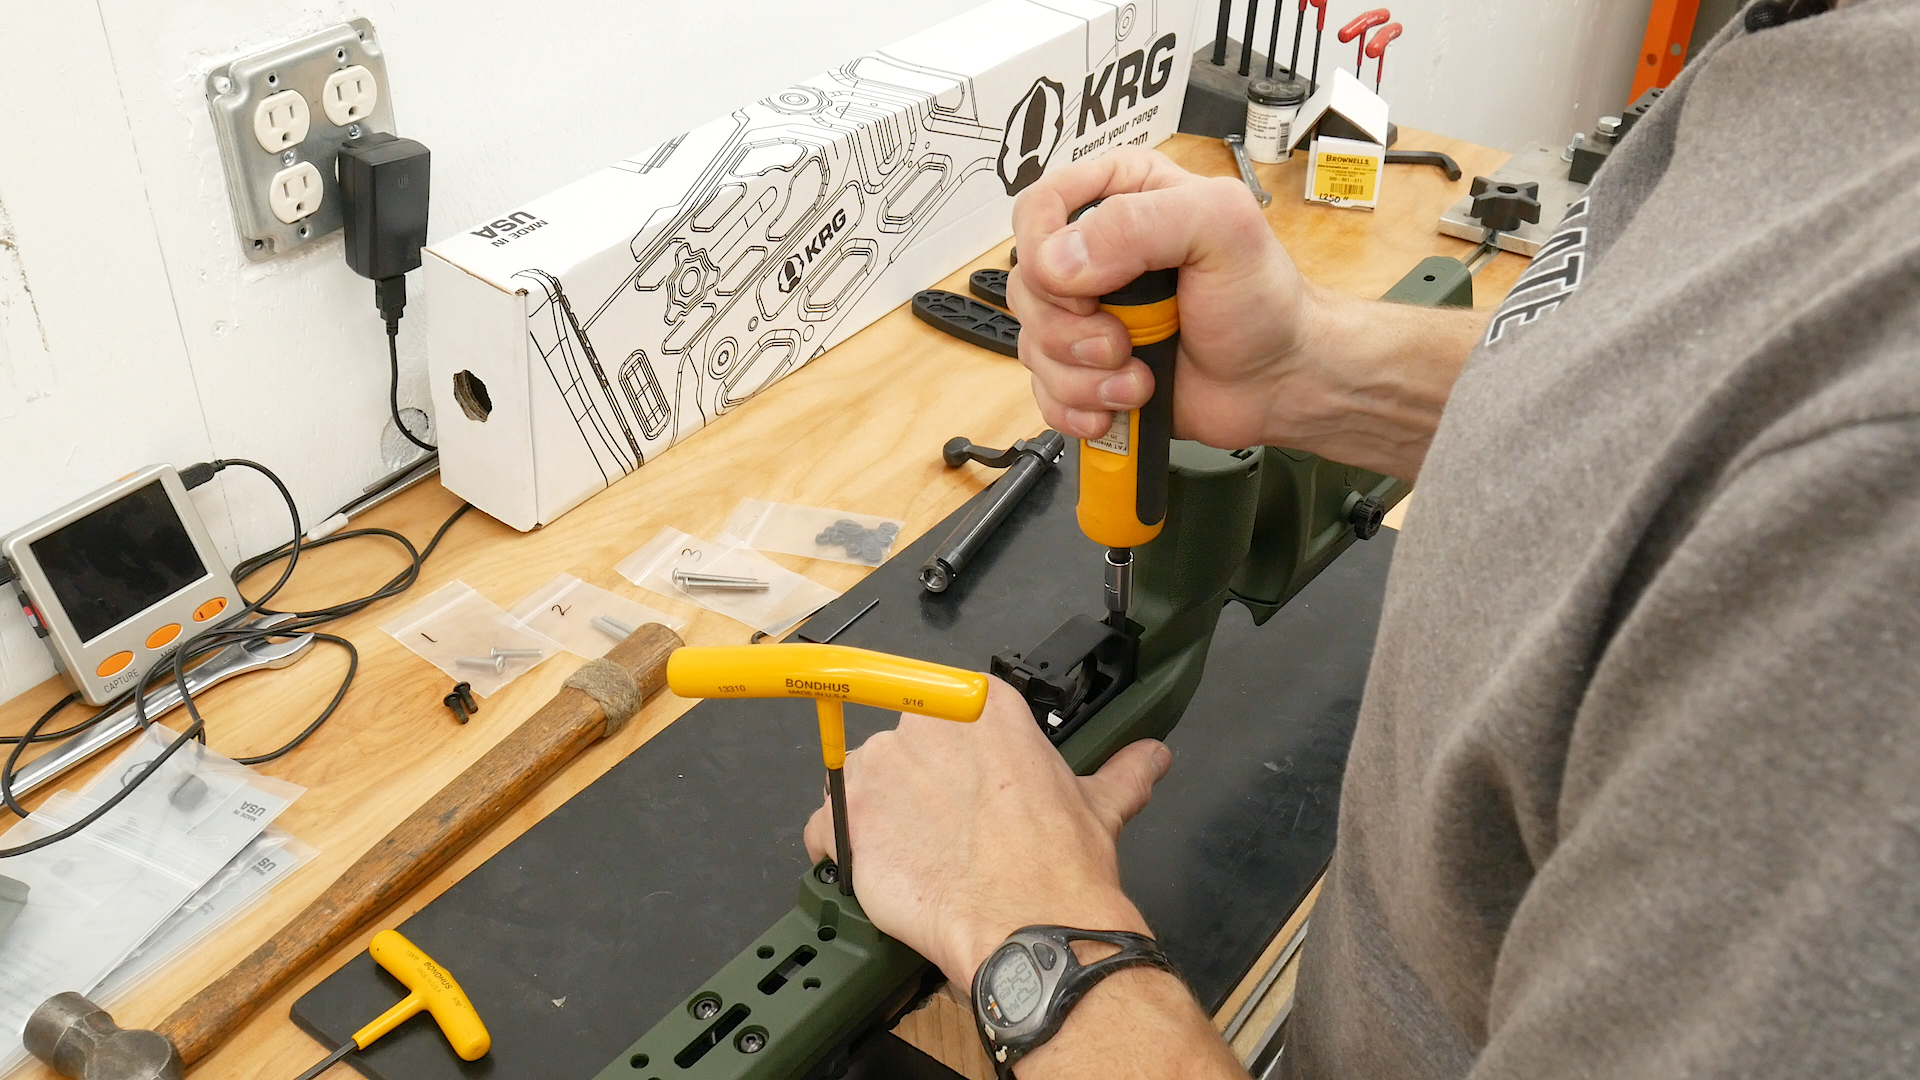
Finally, we tighten the screw on the stock behind the receiver:

If needed, remove the buttpad, insert shims, and use the provided long screws (labeled 1,2,3 corresponding to the number of shims used) to re-attach the buttpad. I used one shim.

At this point, you can install the picatinny rail section, QD attachment point, and make other adjustments as needed. It’s also a good time to do one more function check of the trigger and bolt stop/release. I couldn’t be more pleased with how the TriggerTech special and KRG Bravo stock went together- both great products. And things are looking GREAT! Here’s a sneak peek of the rifle ready to head to the range: (you’ll notice I started with 3 length-of-pull shims, that was too much)
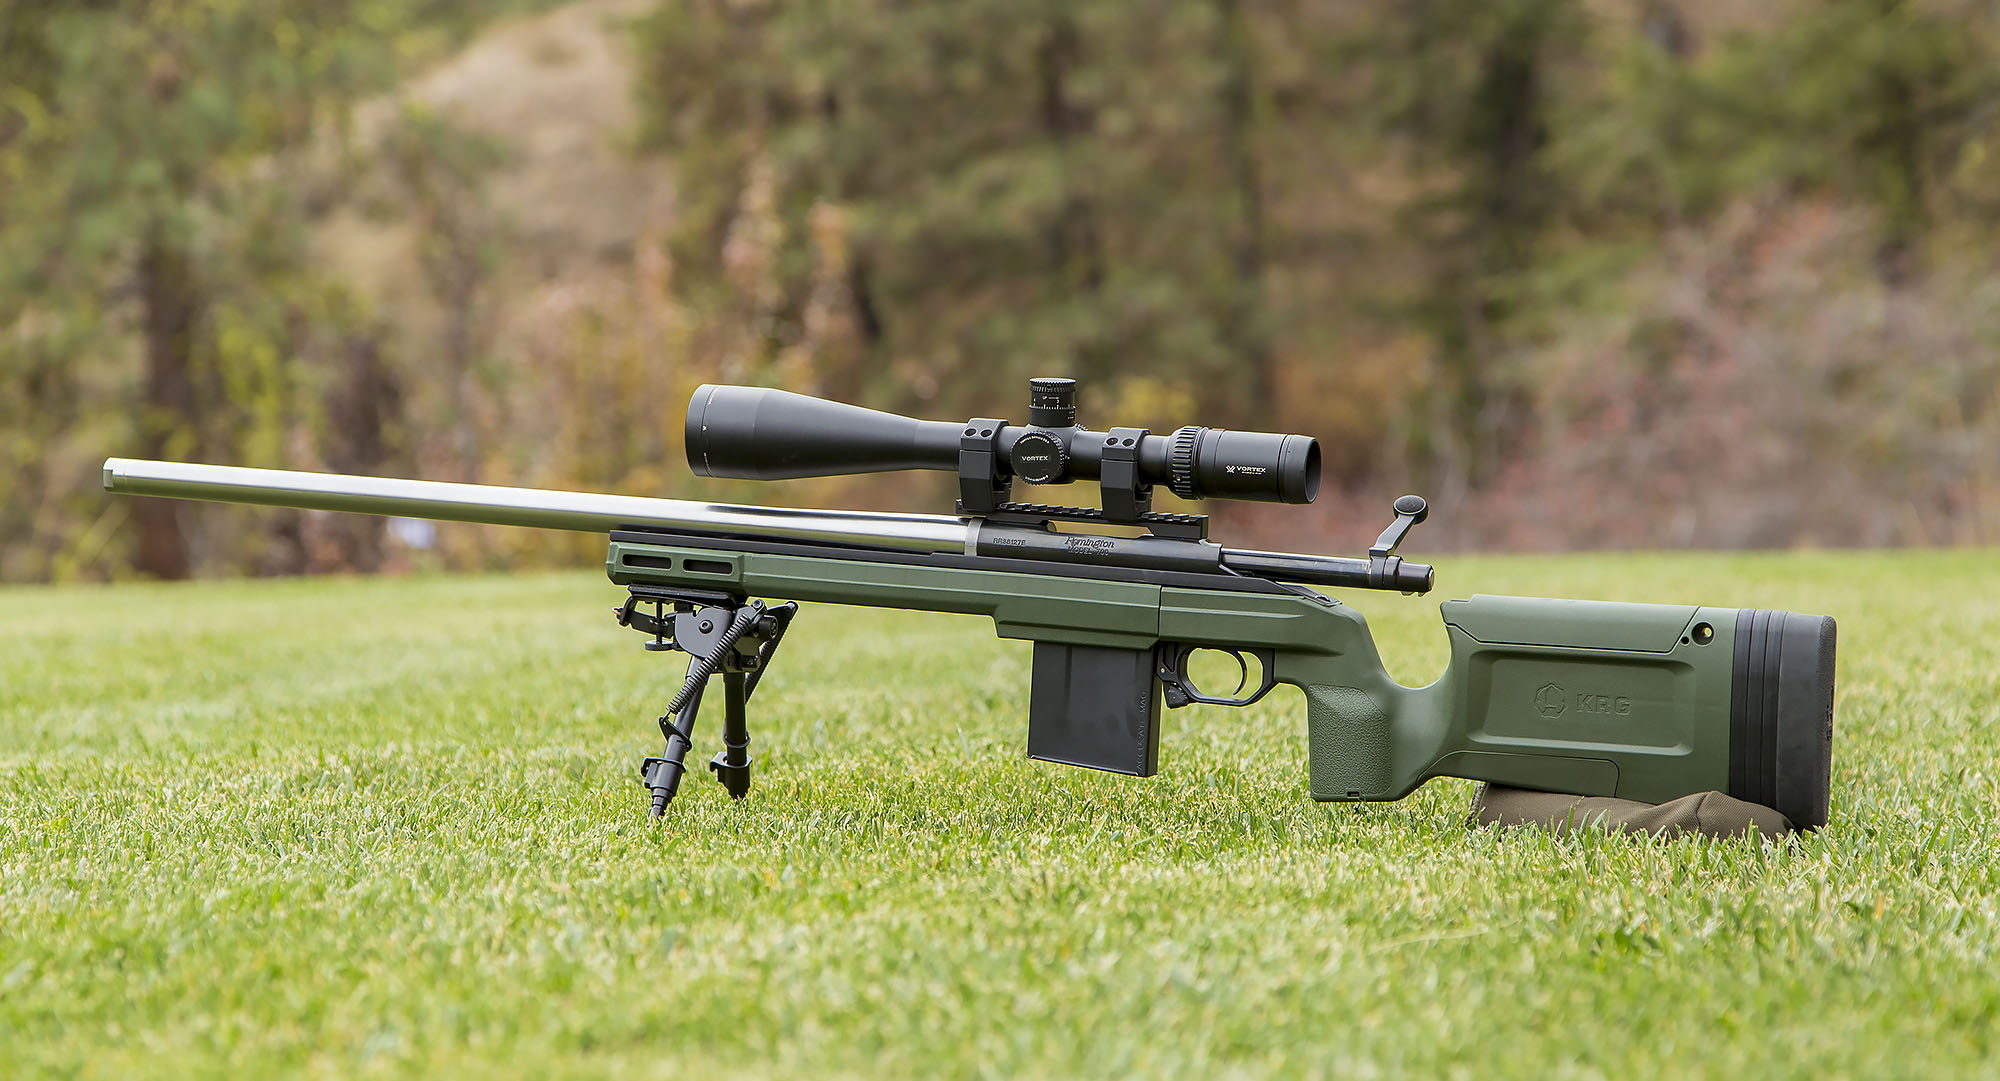
I’m still sorting out what scope I’ll use with this build- for now I’ve stolen the Vortex Viper HS-T 6-24x50mm scope from my Ruger Precision Rifle. We also have one more important thing to take care of- making AICS magazines (what the KRG Bravo uses) work well with 224 Valkyrie. That’s what we’ll look in in the next installment. Make sure you’re subscribed! I’ll also keep you all posted with how this stock and trigger is working, and adjustments made to each. The KRG Bravo has Mlok accessory mounting slots, so there’s lots of great possibilities here!
Are you building a 224 Valkyrie bolt-action rifle? Please leave a comment to share your experiences!
Thanks,
Gavin