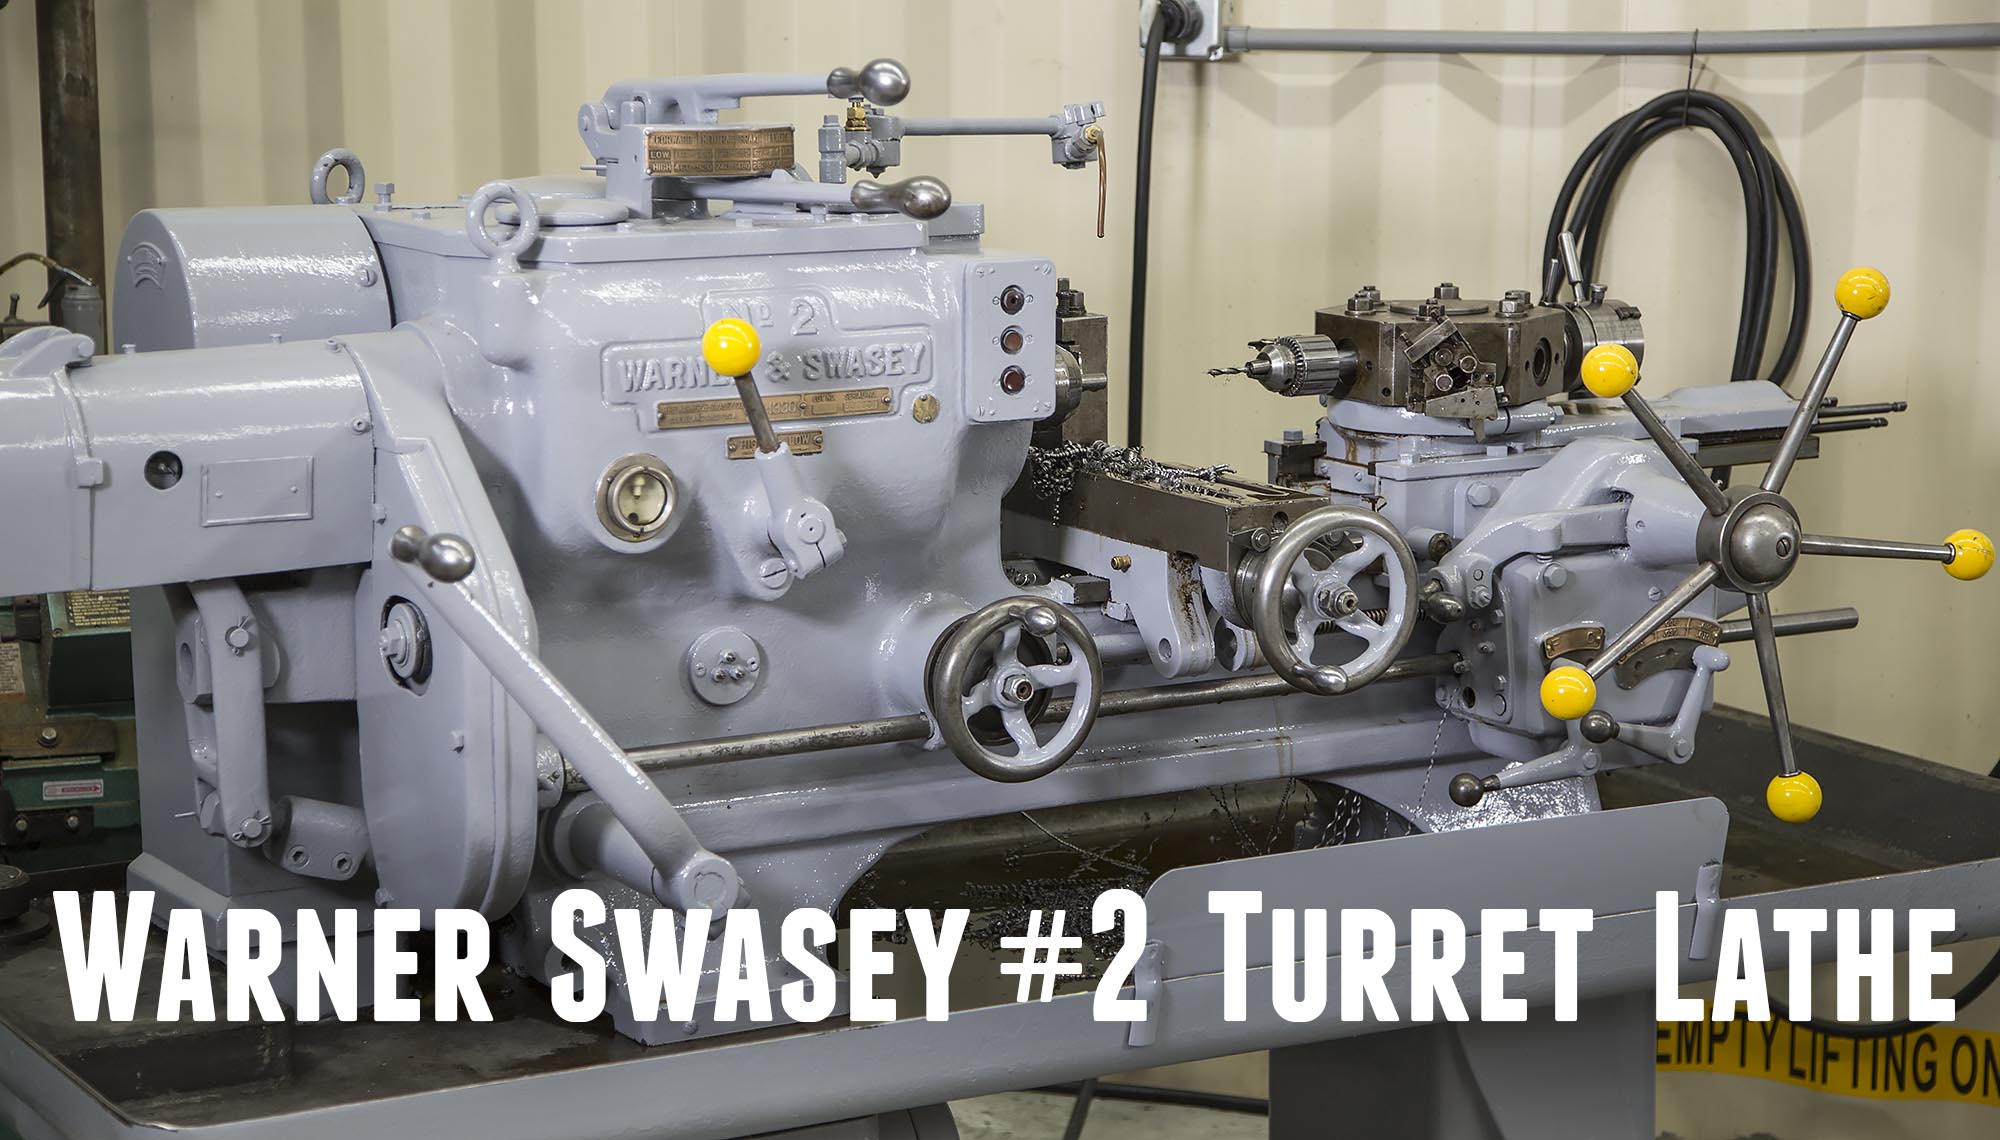
Turret lathes are very handy to have when you have lots of cylindrical small parts to make- and don’t want to use CNC. In fact, for some jobs, a turret lathe can pretty much keep pace with a CNC lathe, and costs significantly less to acquire. I recenly had the opportunity to pick up a late 1940s Warner Swasey #2 turret lathe at a local auction, and I’m glad I did! This is the story of performing a cosmetic restoration on that lathe and getting it ready to use.
Acquiring the Lathe
My friend Earl told me: “Hey, you better check out the Chuck Yarbro auction in Wenatchee, I think there’s lots of machinery”. So I went online, and saw a bunch of GREAT machine shop equipment. A couple of the machines caught my eye- a turret lathe, and a horizontal milling machine. The day of the auction came- and with great anticipation and excitement I participated in the auctions. In the end, I won the turret lathe for $660.00 + auction fees. I was happy! I did not win the horizontal milling machine which was fine- I found a great one locally a few months later.
Here’s the auction listing video for the Warner Swasey #2 lathe that I won as it sat in a hydraulic repair shop:
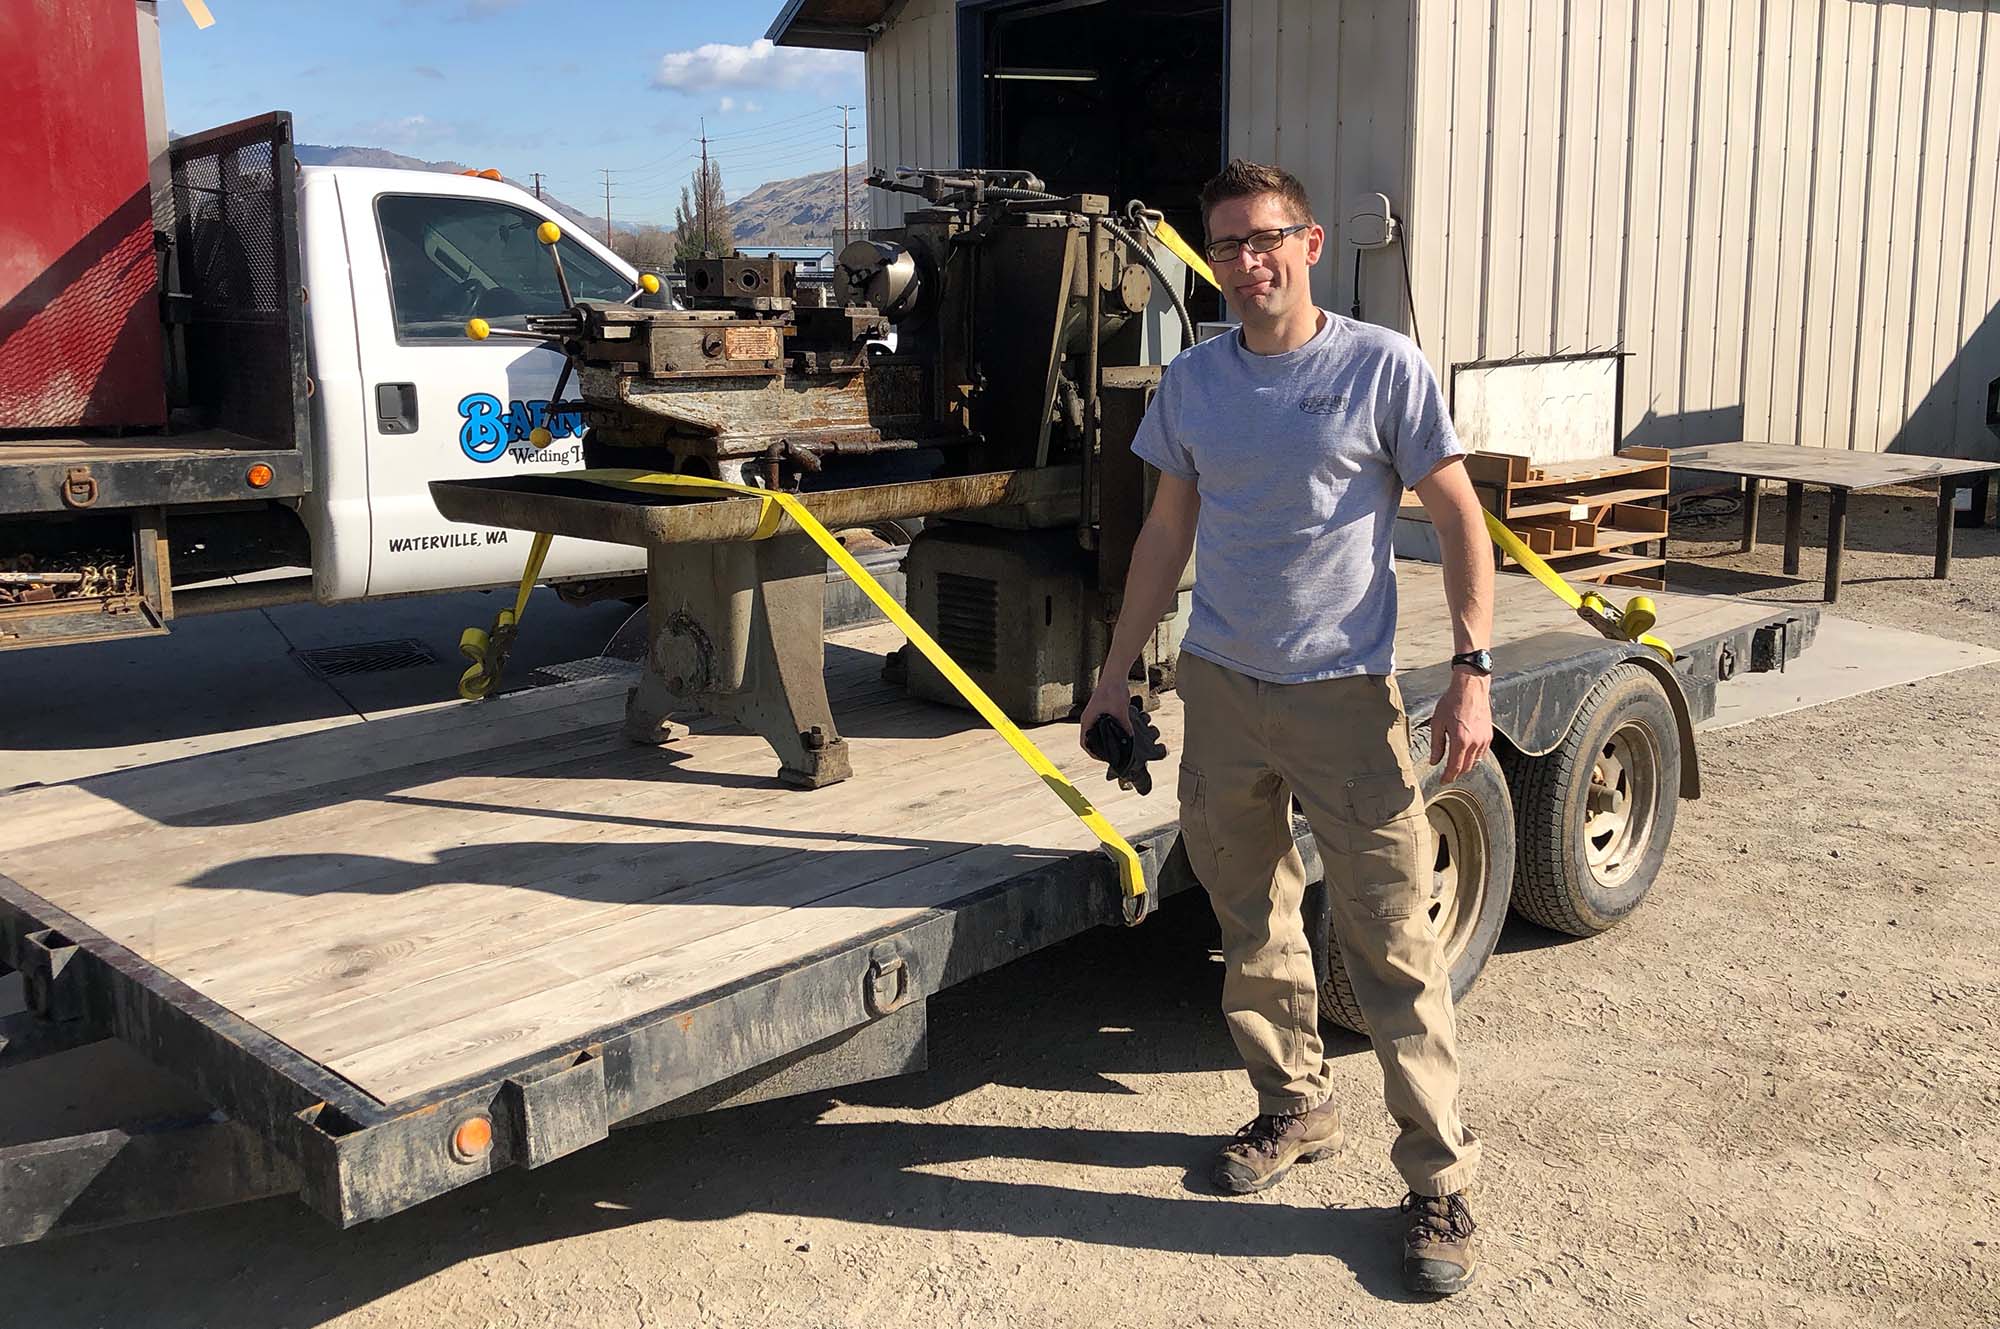
It turns out this machine had sat in the same spot since it was brought into the shop in 1968. And it looked as if it had never been cleaned since then! I would later learn from my friend Gary Moore who I met at this auction that while shop didn’t clean the machines on the exterior they were good about keeping critical fluids changed and lubricating the machines. Here’s a picture of the pickup:

The lathe, which weighs over 3000lb was loaded onto my 16′ flatbed trailer, and before I knew it I was driving down the road with the lathe in tow (and boxes of tooling and accessories). Here I am with the lathe after loading:
The trip went very smoothly! Before heading up the dirt road to my shop, I covered the lathe with a tarp (tucked around the lathe) for the ~5mph remainder of the journey. It was a relief to have the lathe up to the shop, but it would have to live on the trailer under a tarp until the concrete floor was poured in the shop. That took about a month- but fortunately it was summer, so the lathe didn’t suffer any detrimental effects.
Here’s a picture of the lathe as I got it after moving it into the shop:
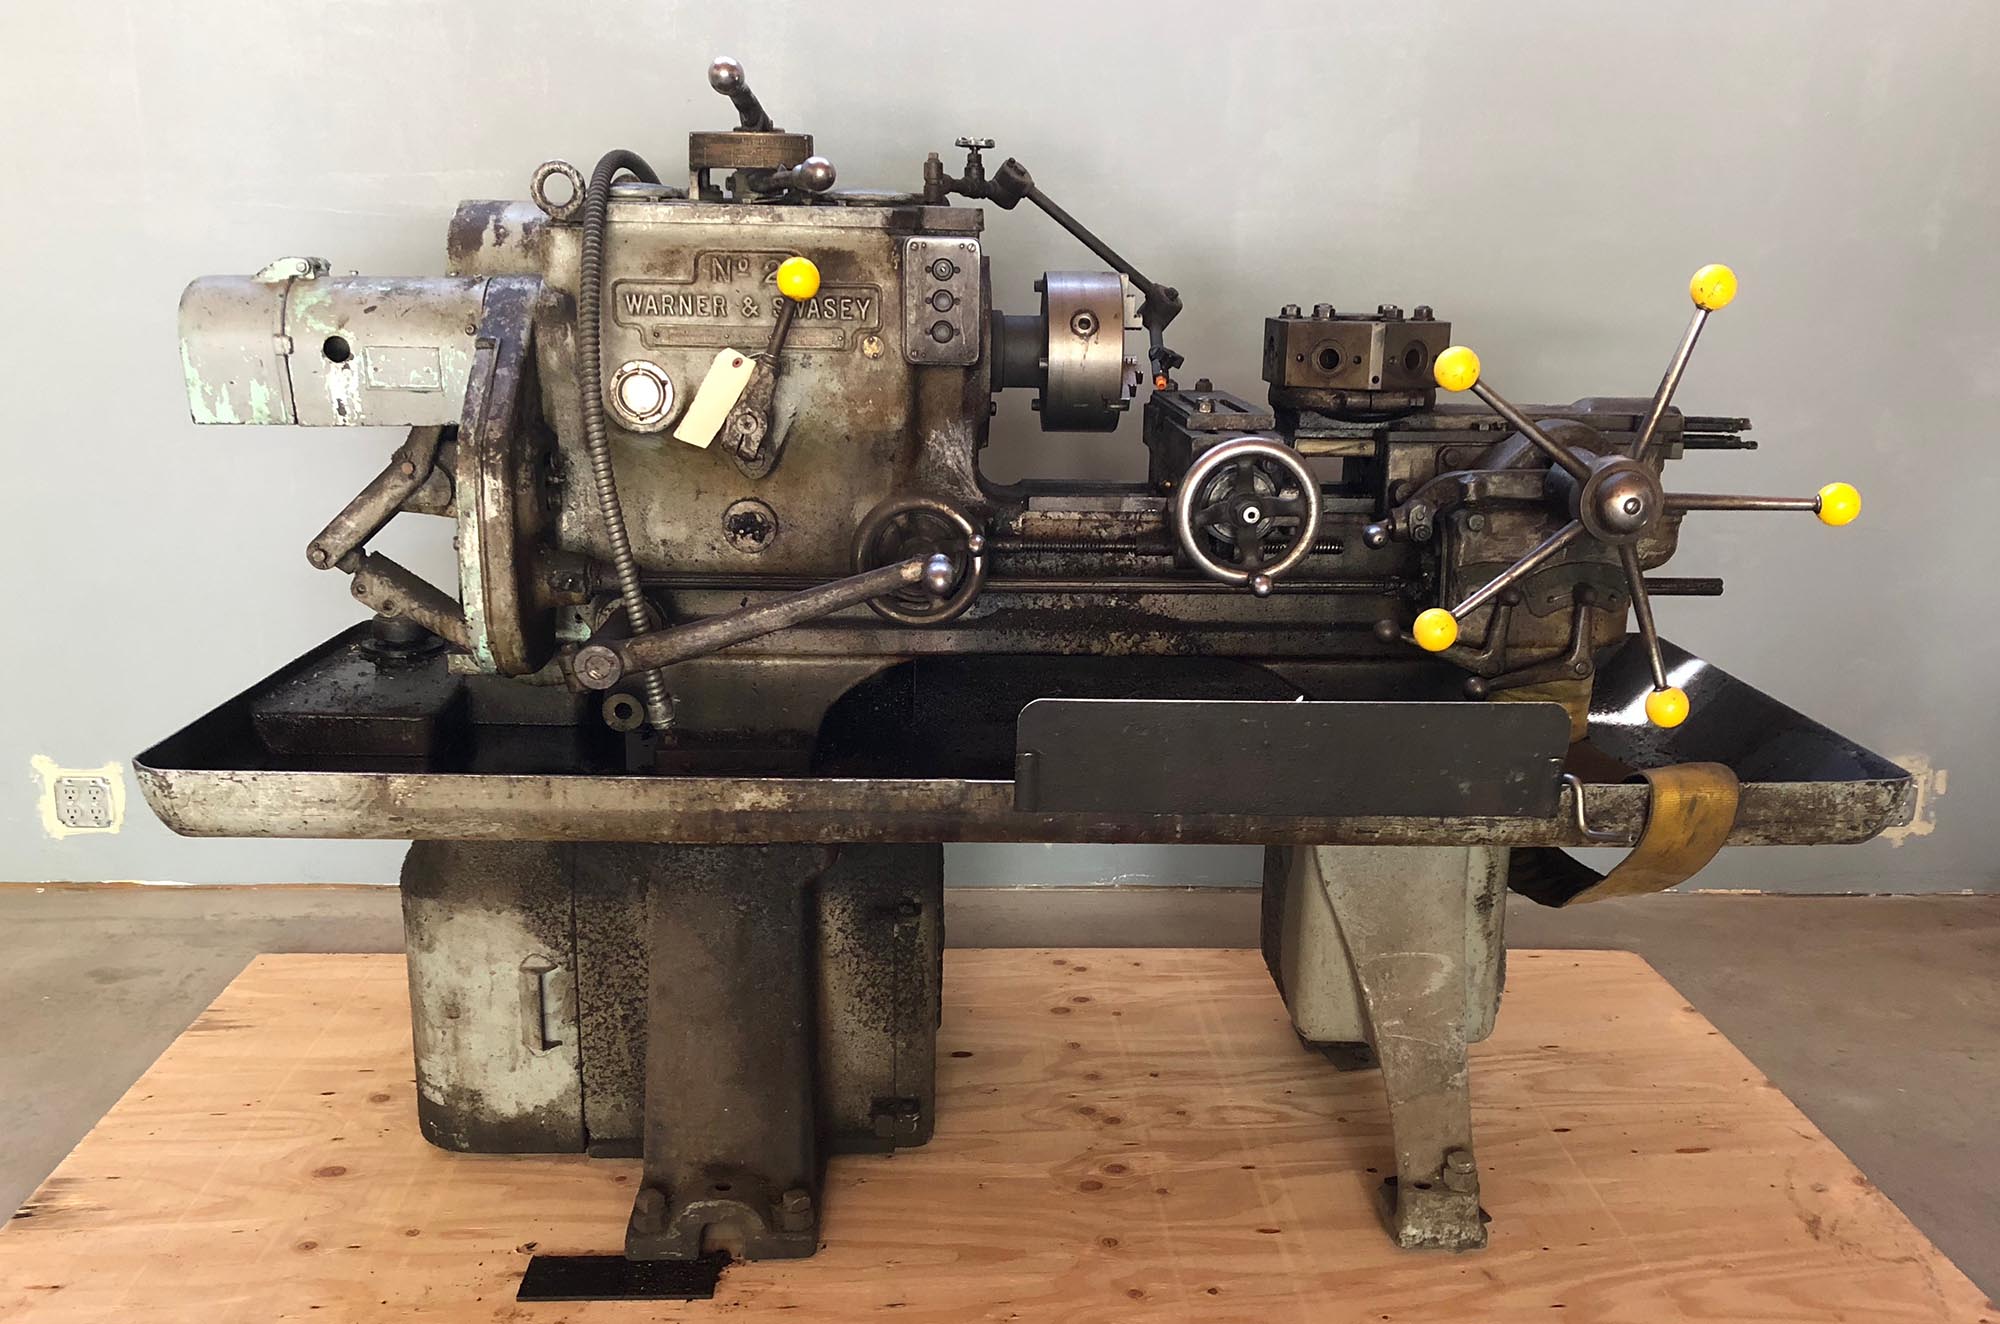
Can you say “SCUNGY AND DIRTY” ? This lathe was covered with a thick coat of dried oil, machining chips, grease, and general filth. I knew I would have my work cut out for me, because I know I had to paint this lathe!
Cleaning and Paint Prep
Since the lathe was in good running condition, I decided to focus on:
- Cleaning without much disassembly. I would not use compressed air or water – I didn’t want to force chips or water into cracks and crevices!
- Inspection and adjustment
- Lubrication and changing of fluids
- Tool setup for jobs I would use this lathe for
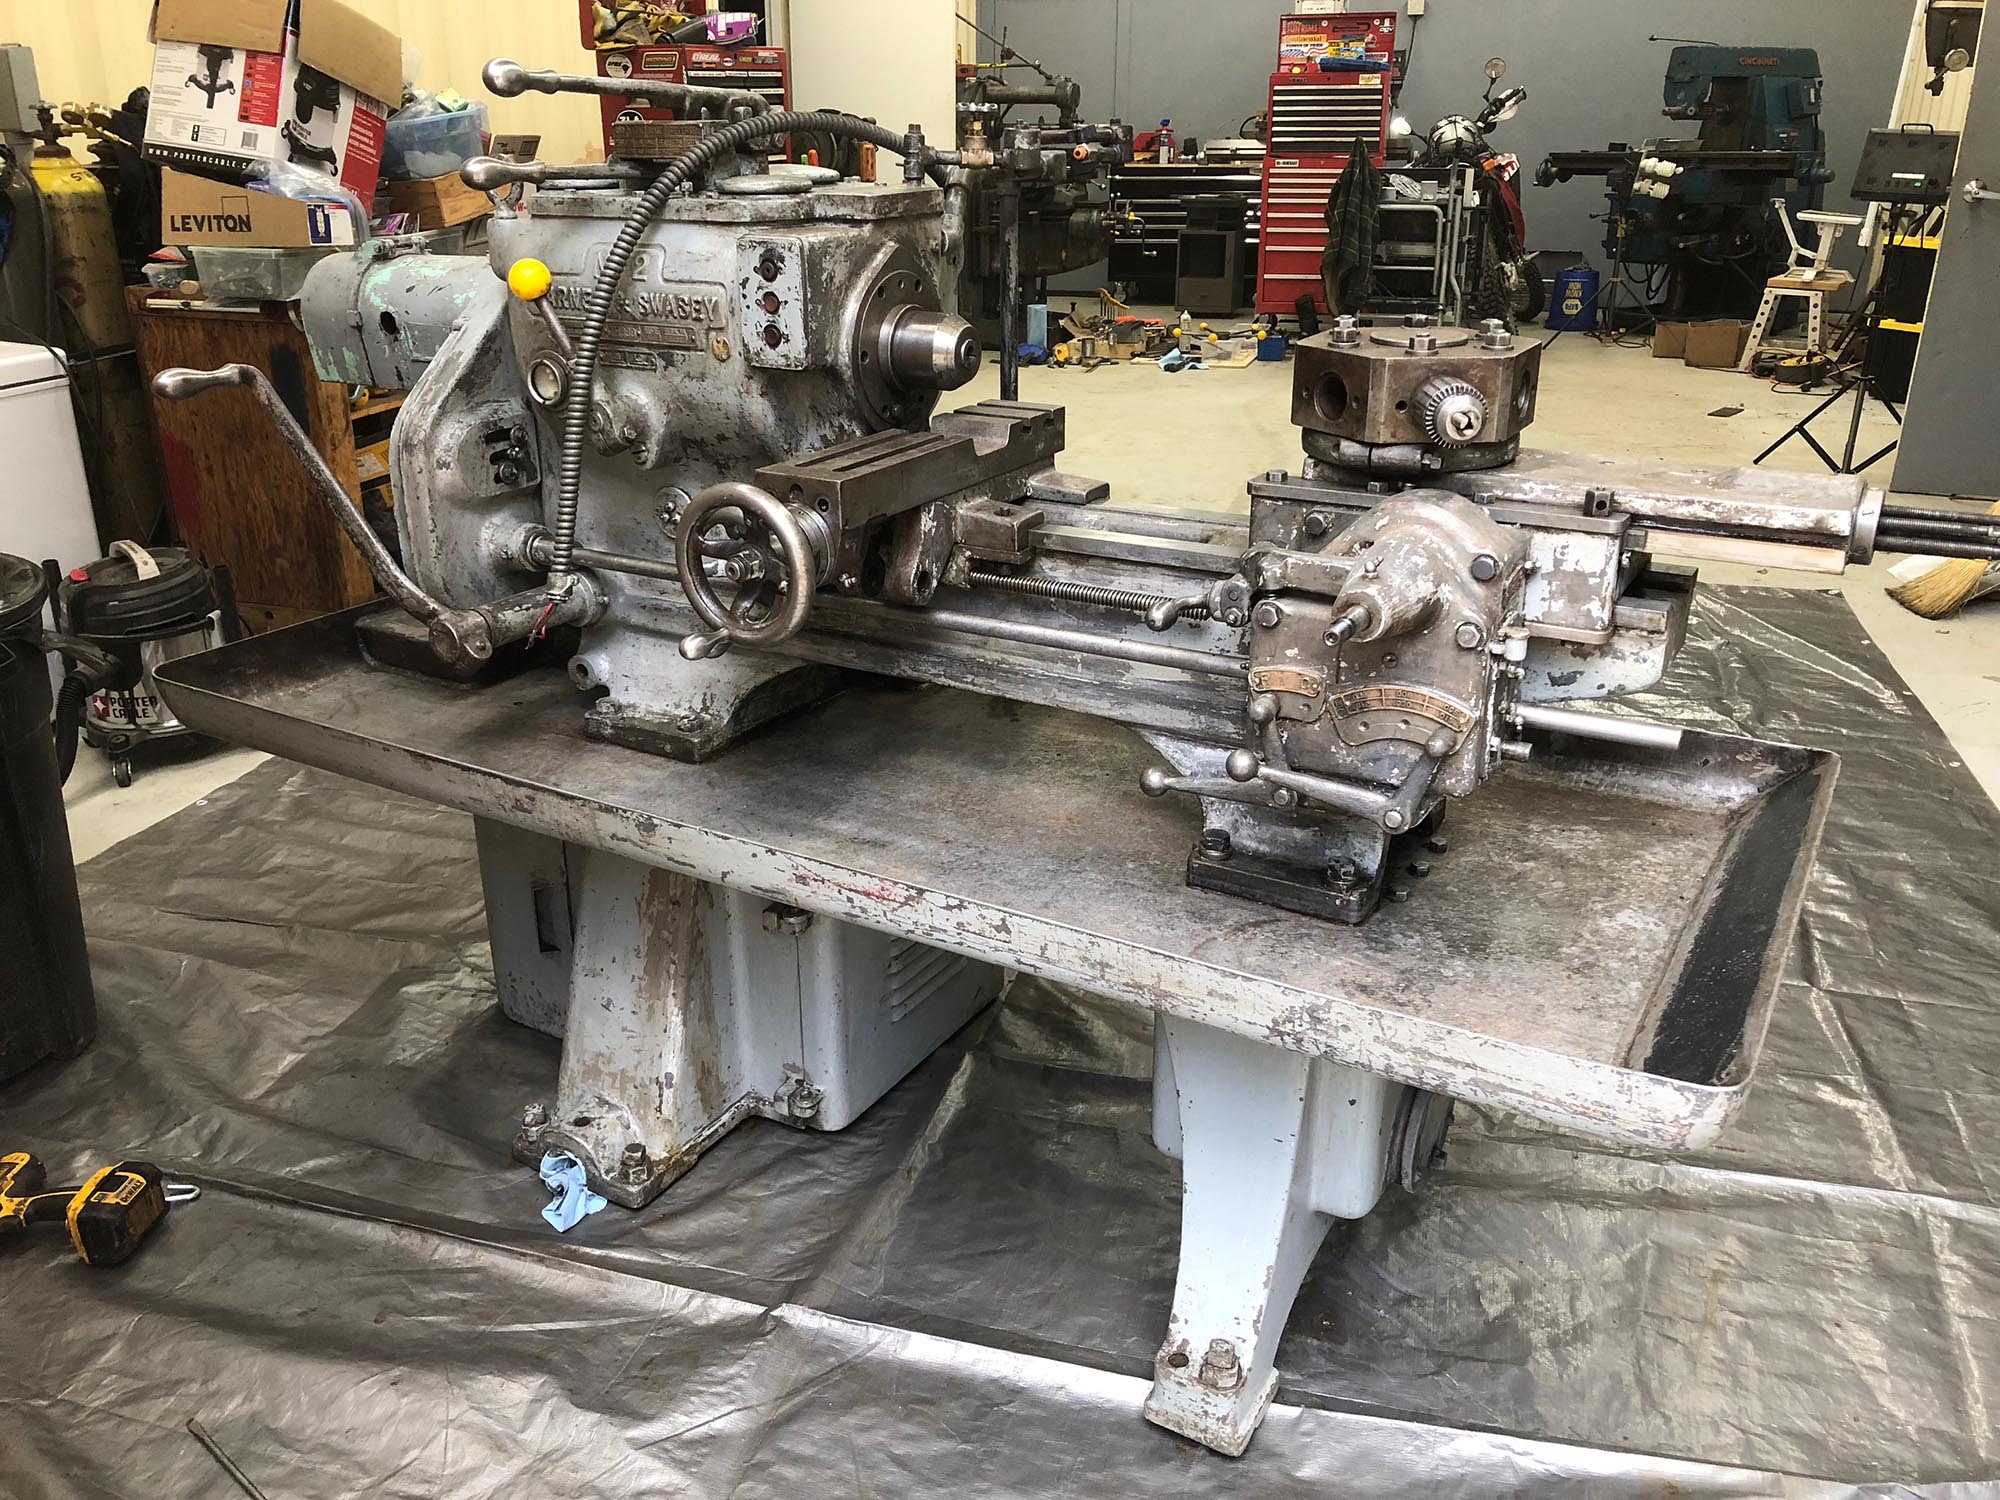
So I went to work with Royal Purple spray, a paint scraper, and some small wire brushes. I estimate that I spent about 20 hours scraping and cleaning this machine to remove the caked on chips, oil, and grease. It was so old that it came off in “sheets” in places. Before paint, I did a final degrease job with lacquer thinner. Here’s the machine before masking:
I decided to go “automotive style” with the paint job because I had first-hand experience with expoxy primers and polyurethane paints (I worked at a body shop in High School). I would use high-quality masking tape from an autobody store as well, no use in cheaping-out on sub-par tape resulting in frustration and extra work while cleaning up and unmasking. I took my time- the prep work is SOOOO important when it comes to paint work- you can’t take shortcuts! Here’s what the lathe looked like after masking and before painting:

Next would be paint!
Painting the Lathe
I decided to use a new LVLP (Low Volume Low Pressure) gun that I bought on Amazon for this job. The gun did well, especially given my sad compressor situation- and no air dryer (only an inline filter). Here’s the details on the gun: ($125. when I bought it)
Astro EVOT14 EuroPro Forged LVLP Spray Gun with 1.4mm Nozzle and Plastic Cup

- Forged body provides longer tool life and anodized body for corrosion protection with internal coated passages
- Stainless steel needle and fluid tip with slick finish for faster & easier cleaning
- “Air Curtain” design to minimize overspray and pollution with superior transfer efficiency to reduce paint consumption
- Innovative, advanced EVO-T technology (Patented) providing finest atomization & classic quality
- Soft trigger pull to reduce fatigue, lubricated adjustment knobs for better control, and advanced CNC machining to avoid the need for gaskets behind the tip
I’m looking into compressors and air dryers for the shop- something I’ll need for everything from plasma cutters to paint guns to air tools. I can’t wait!
Here’s the paint products I used for this lathe paint job:
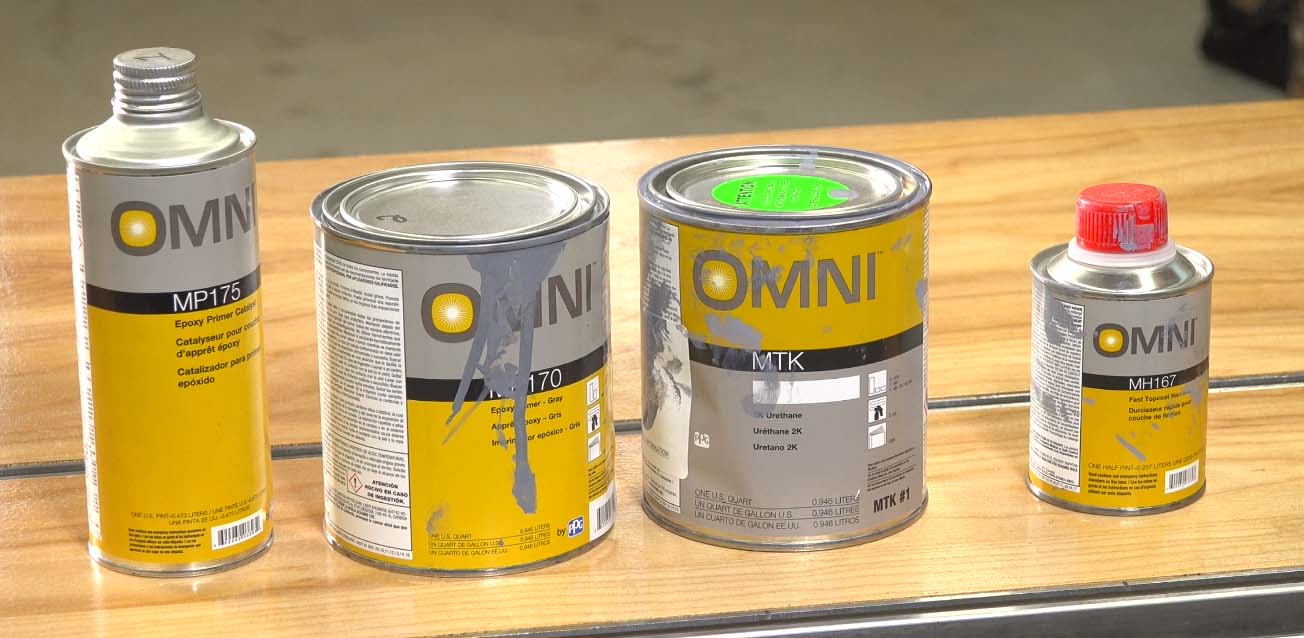
Pictured above:
- Omni MP170 epoxy primer and MP175 catylist (made by PPG)
- Omni MTK 2K Urethane Paint and MH167 hardener (made by PPG)
First up was the primer, which went down pretty smooth. After a couple coats of epoxy primer with 10 minutes dry time between coats, I let the primer flash for about 1/2 hour. Then it was time for the paint itself! I put down three coats, and really like how the paint came out! Here’s what things looked like when I was done painting, but before unmasking:
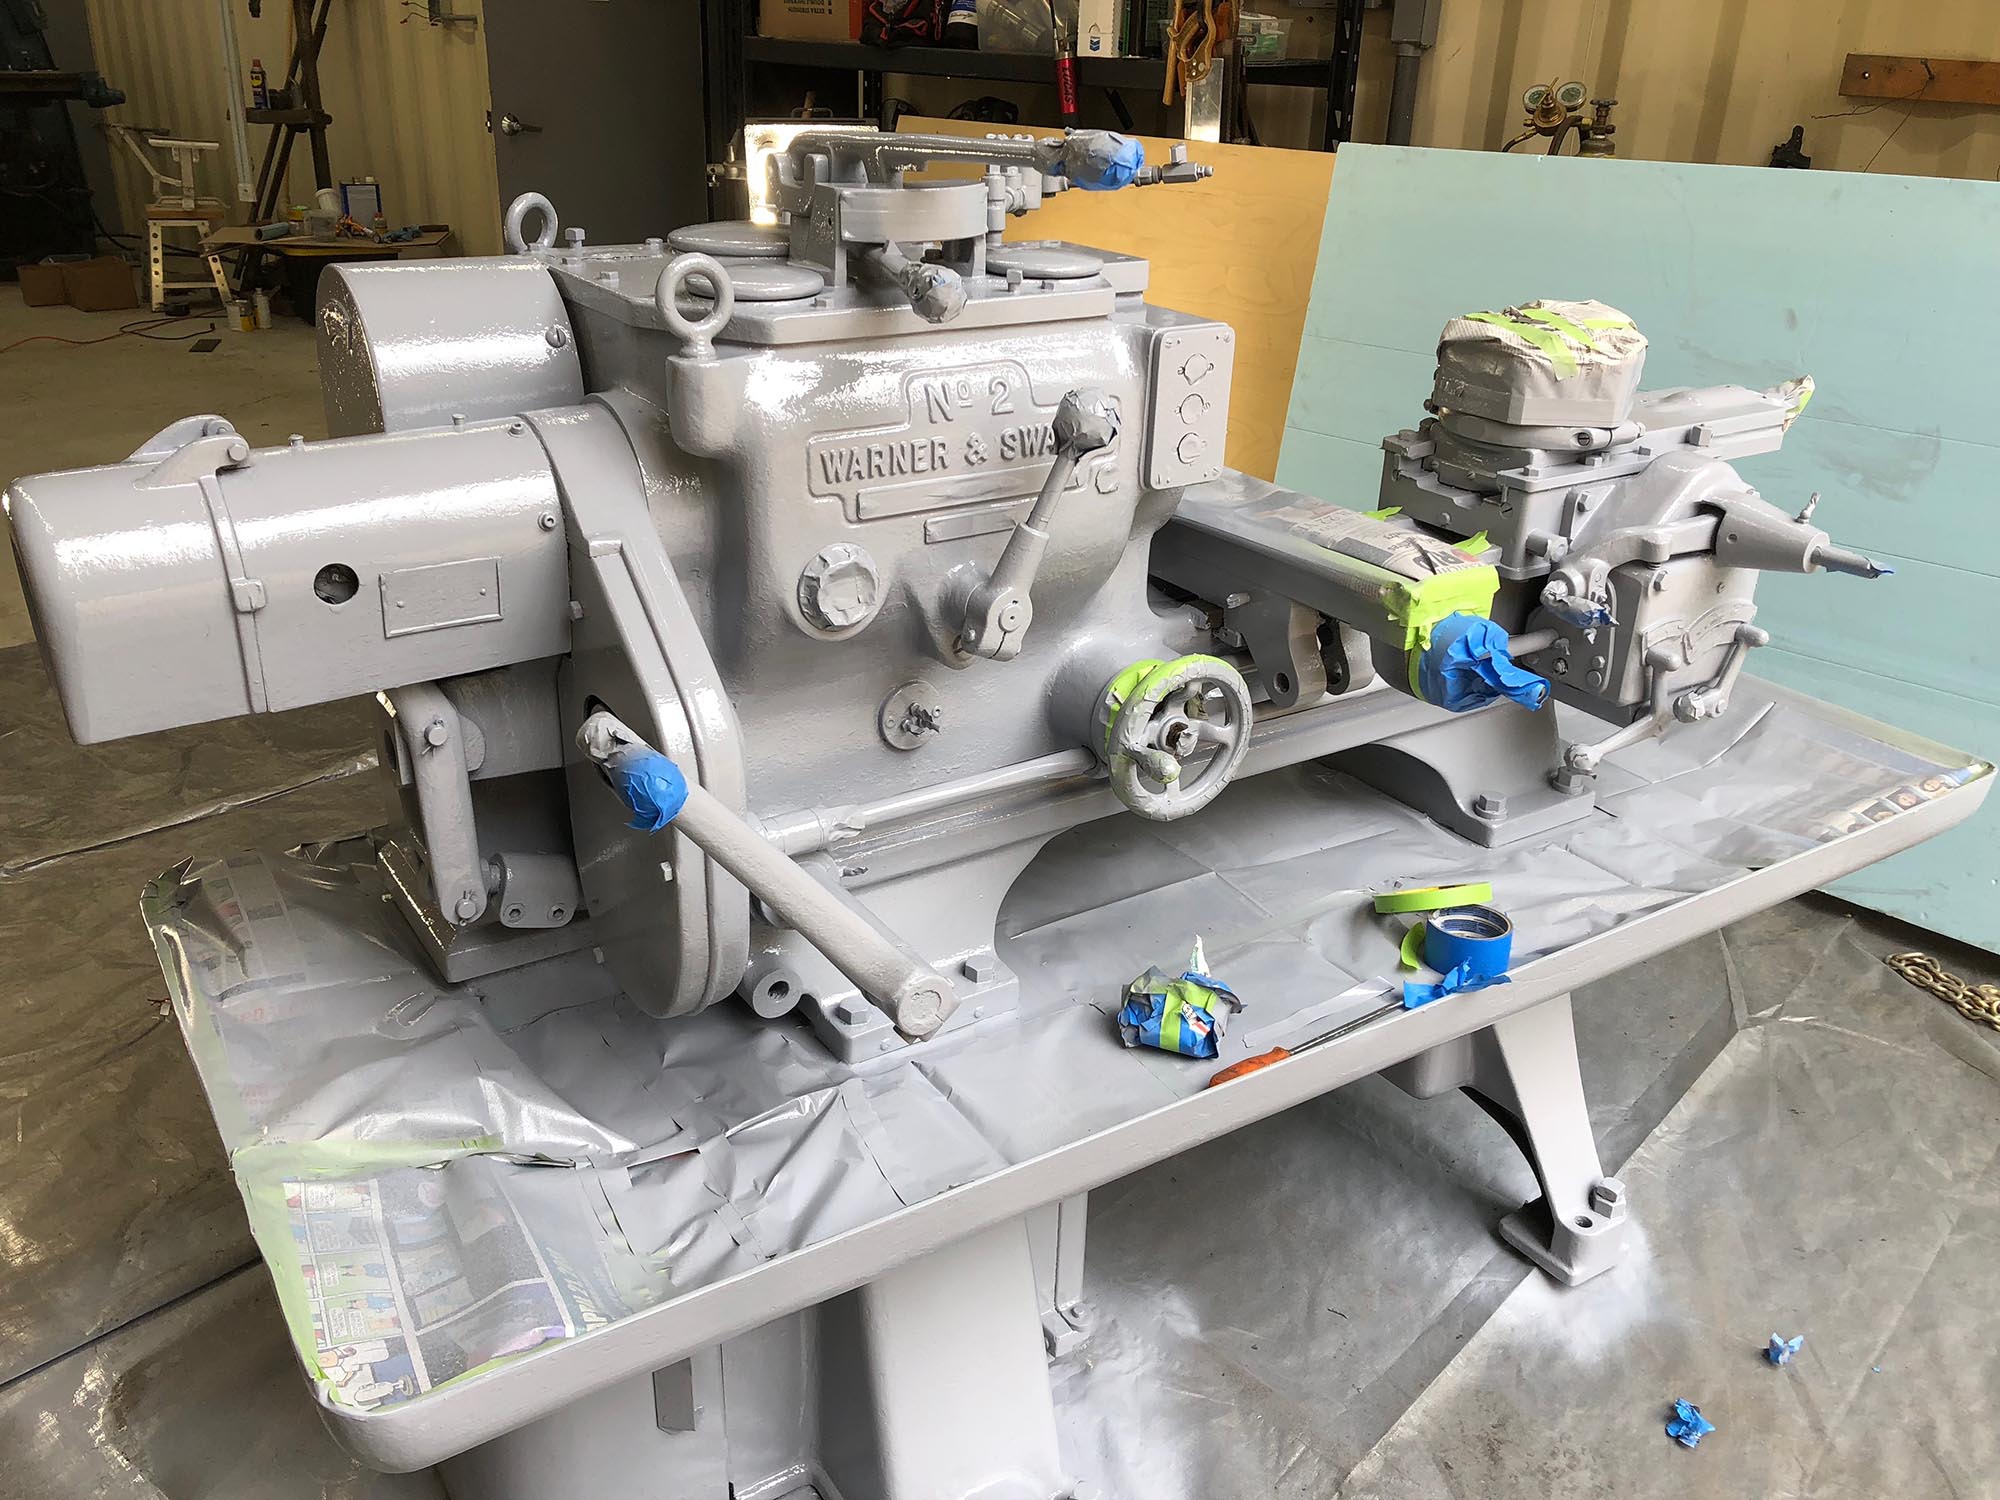
The Final Product
It was really fun and rewarding to unmask the lathe, to reassemble it, and put it to use! It turned out exactly as I had hoped.

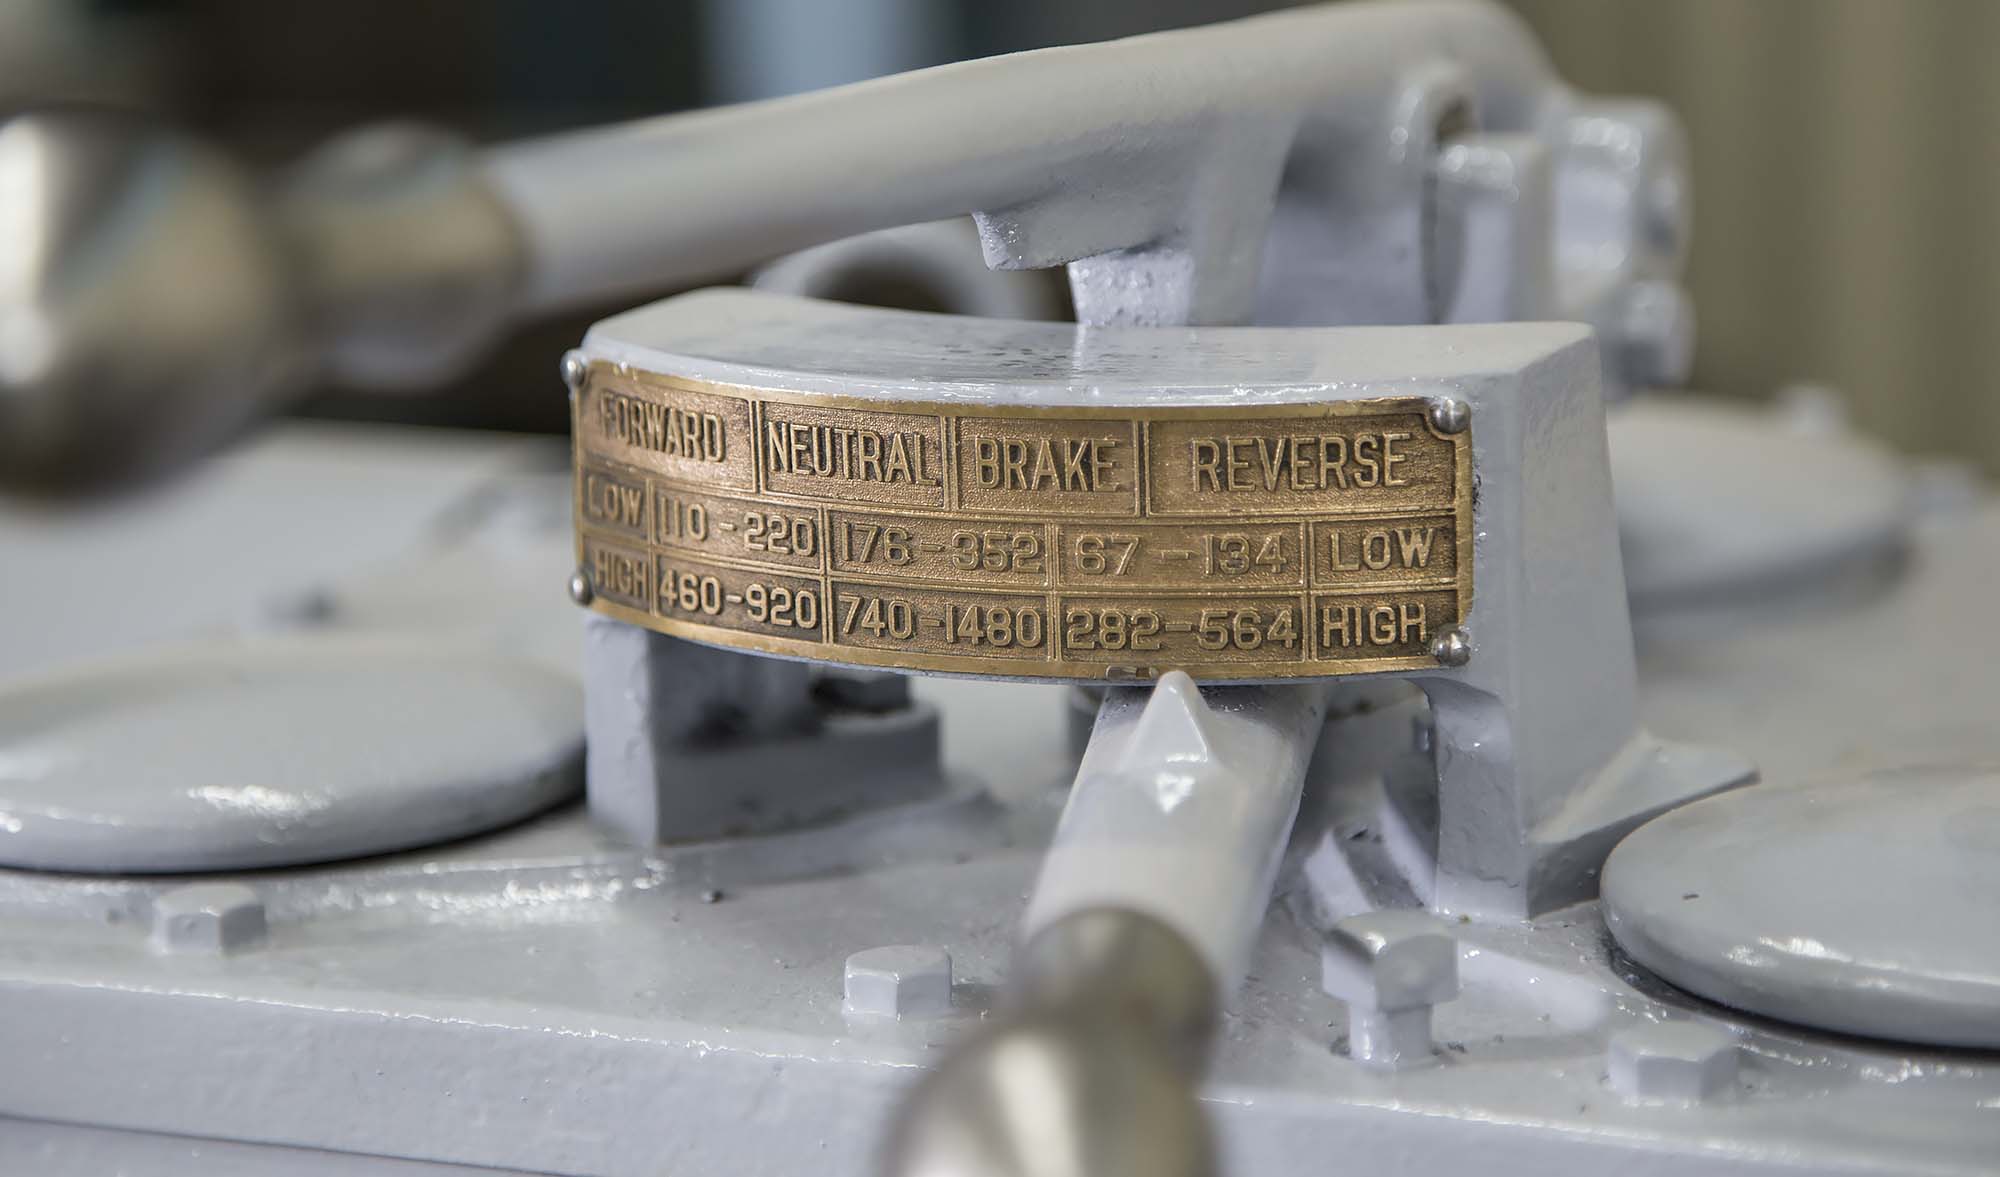
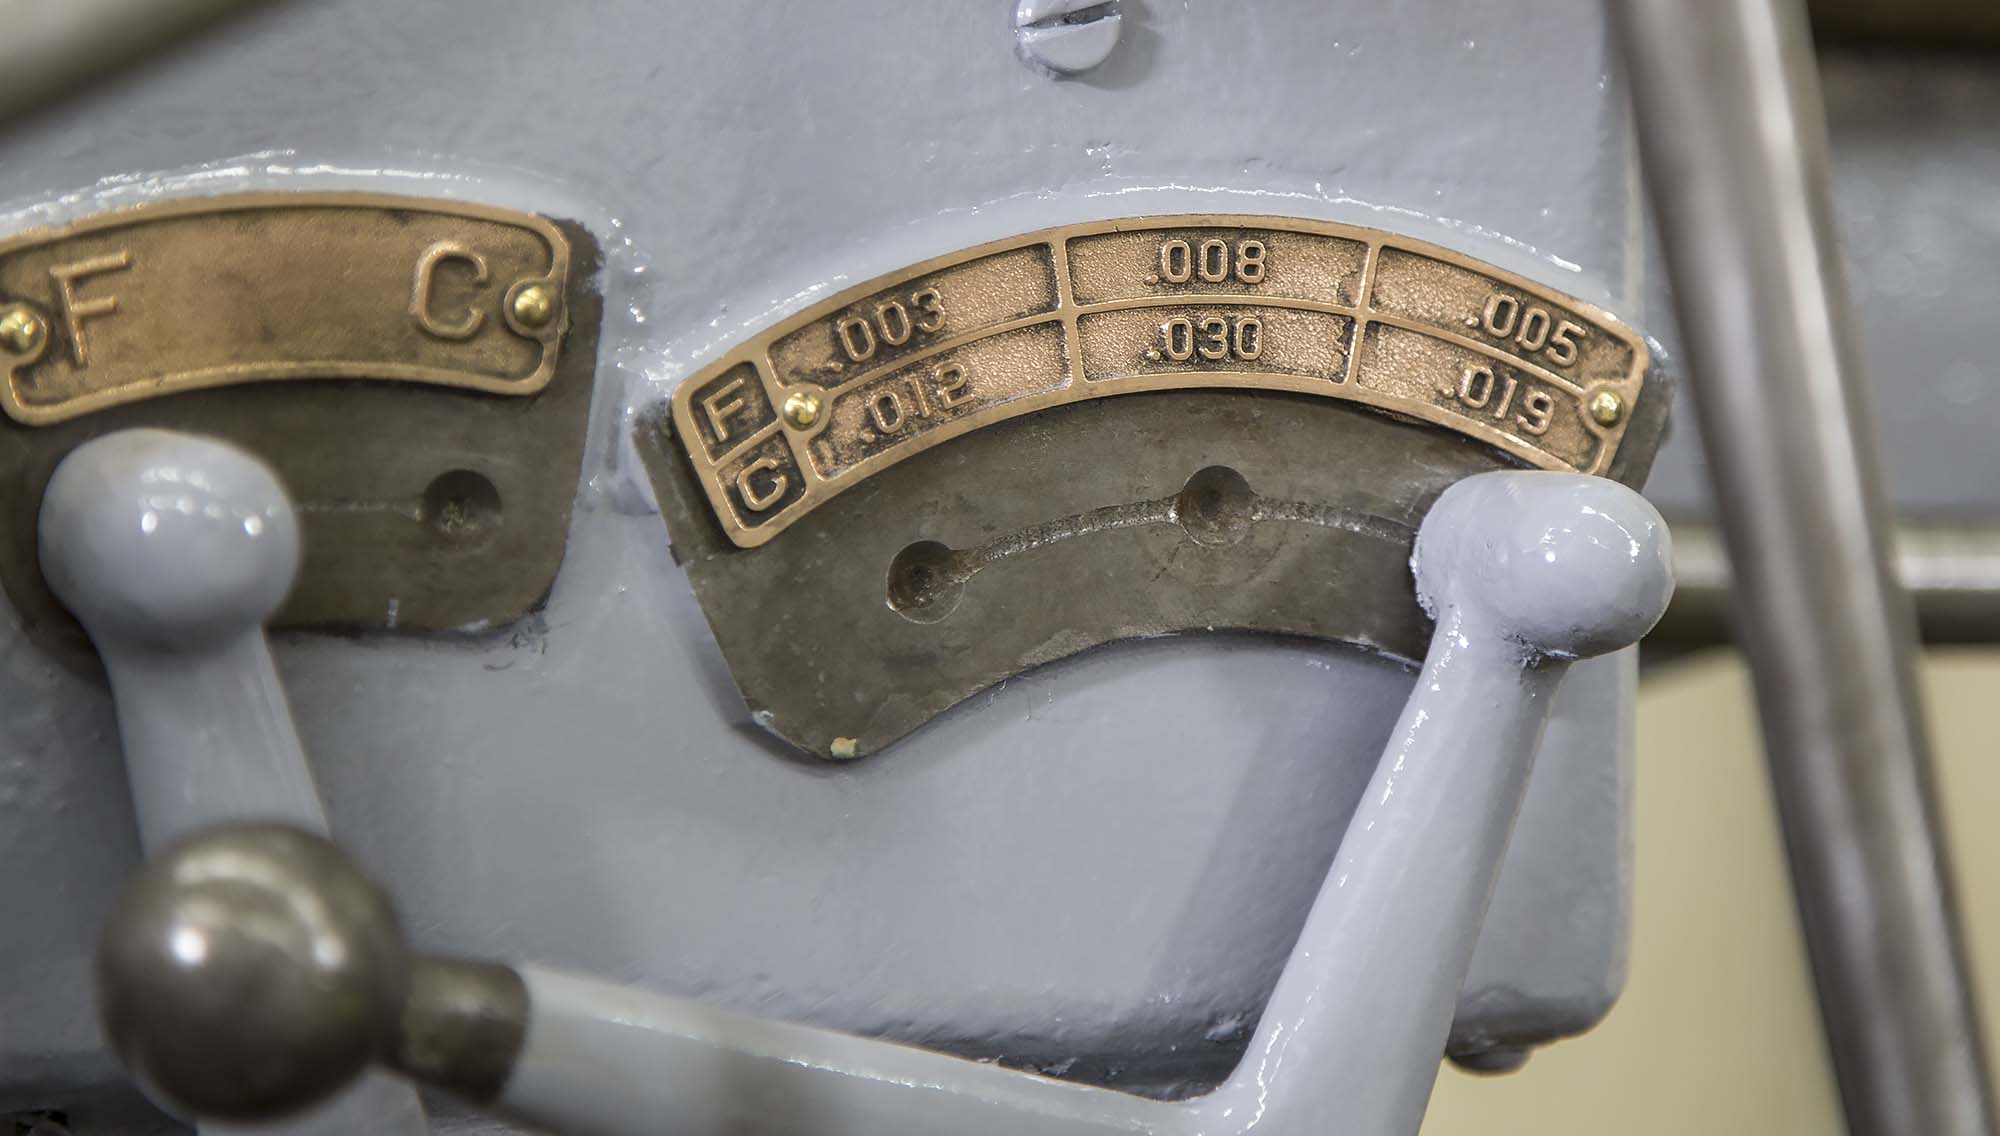
The brass plaques for speeds and feeds turned out great, they had been painted over previously!
Using the Lathe
After the paint job I’ve spent quite a while on getting tooling setup, experimenting with adjustments, grinding cutters, and generally having fun with this machine. It came with LOTS of tooling- a complete collet set, and a nice 3-jaw chuck. I’ll be able to do a lot with this machine, and I’ve really only started my journey with this lathe.
One of the things that made the setup for this lathe really easy was my American Rotary AI 20 Rotary Phase Converter– All I had to do was run three wires to the breaker on the output side of this RPC, and make sure my spindle rotation direction was correct. Just like I had 3-phase coming into the shop!
I’m looking forward to the rest of the story! Don’t be surprised if you see this lathe in more stories here on Making with Metal! I’m really glad I only had to do a cosmetic restoration and not a mechanical one! I want to use this machine…
Do you have a machine purchase or restoration story to share? Please leave a comment!
Thanks,
Gavin


$660.00 Man, you talk about the Machine deal of the century. A new Chuck for it would cost that much. I would’ve gave 2k$ in a New York minute, and walked away thinking I stole it for that price.
Congratulations!